A Vest for 30

I’m starting to notice a seasonal pattern I experience around late fall each year. After a long hiatus from making things with my hands, or even thinking about making things with my hands, I feel drawn into a flurry of creative practice.

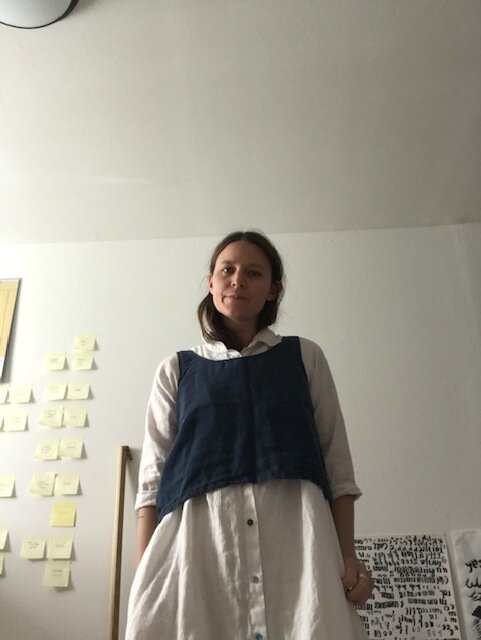
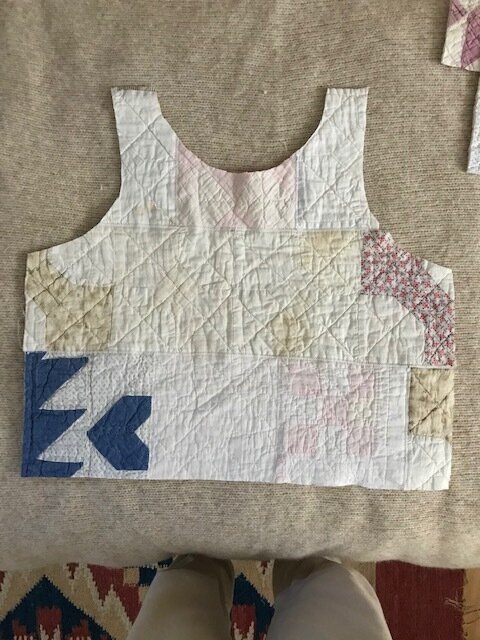
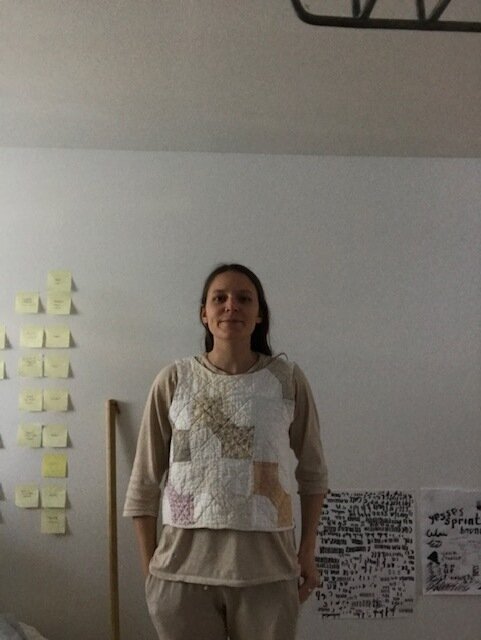
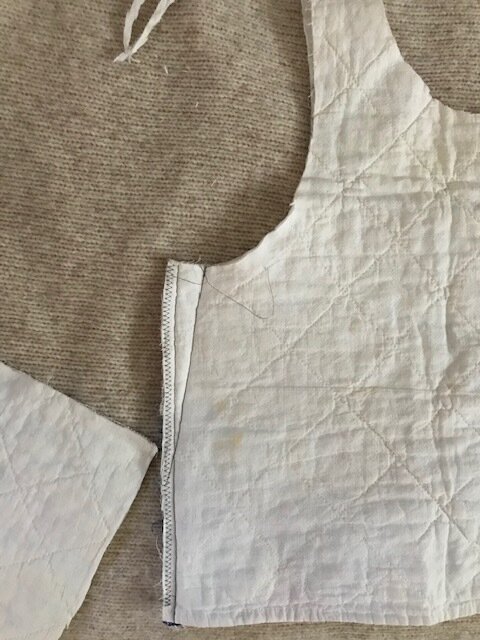
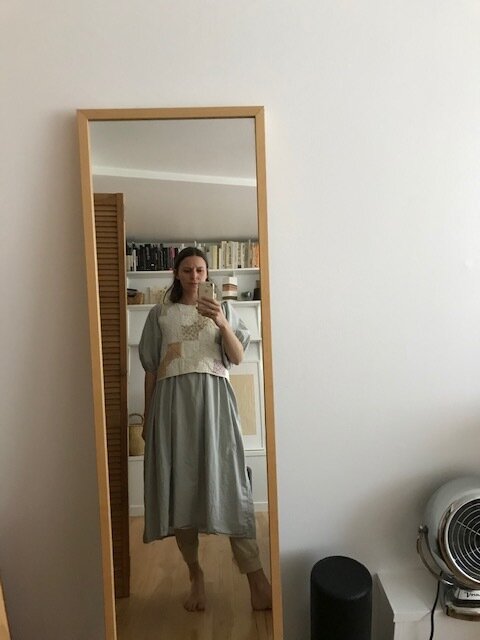
This vest was born out of the last few weeks of this flurry-feeling.

On October 24th, I taught a beginner’s drop spinning class, an invitation for me to reacquaint myself with creative practice, and a little nudge towards accountability. The class was so wonderful and my students were so kind with my fumbling around, getting back into the teaching rhythm.

When I got home that afternoon, I was abuzz. I started working on various random projects and getting excited about knitting.

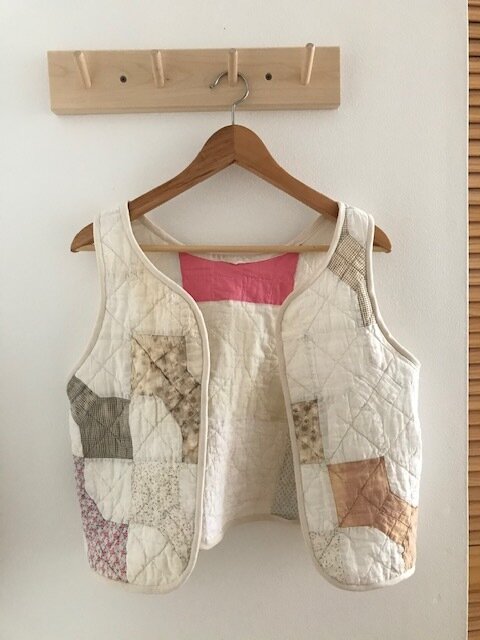
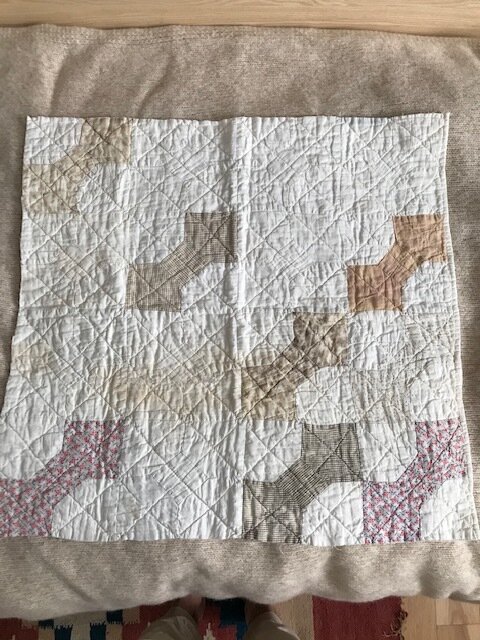
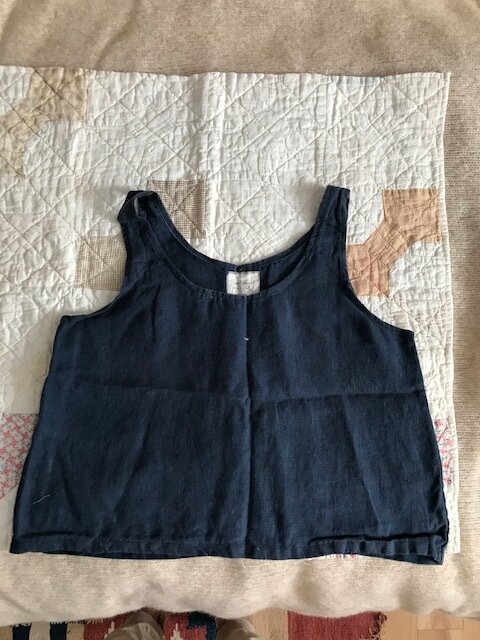
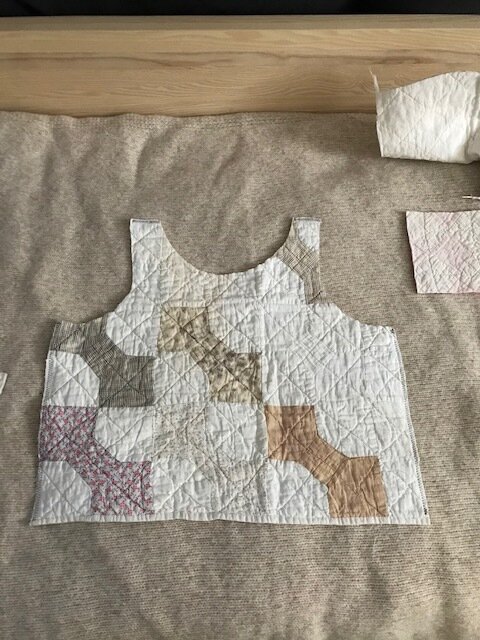
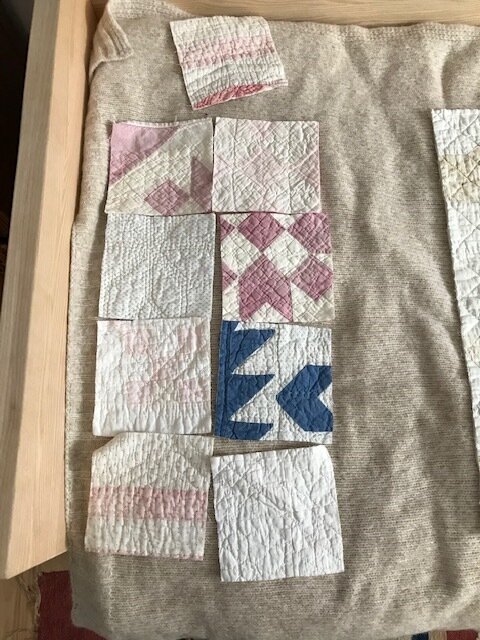
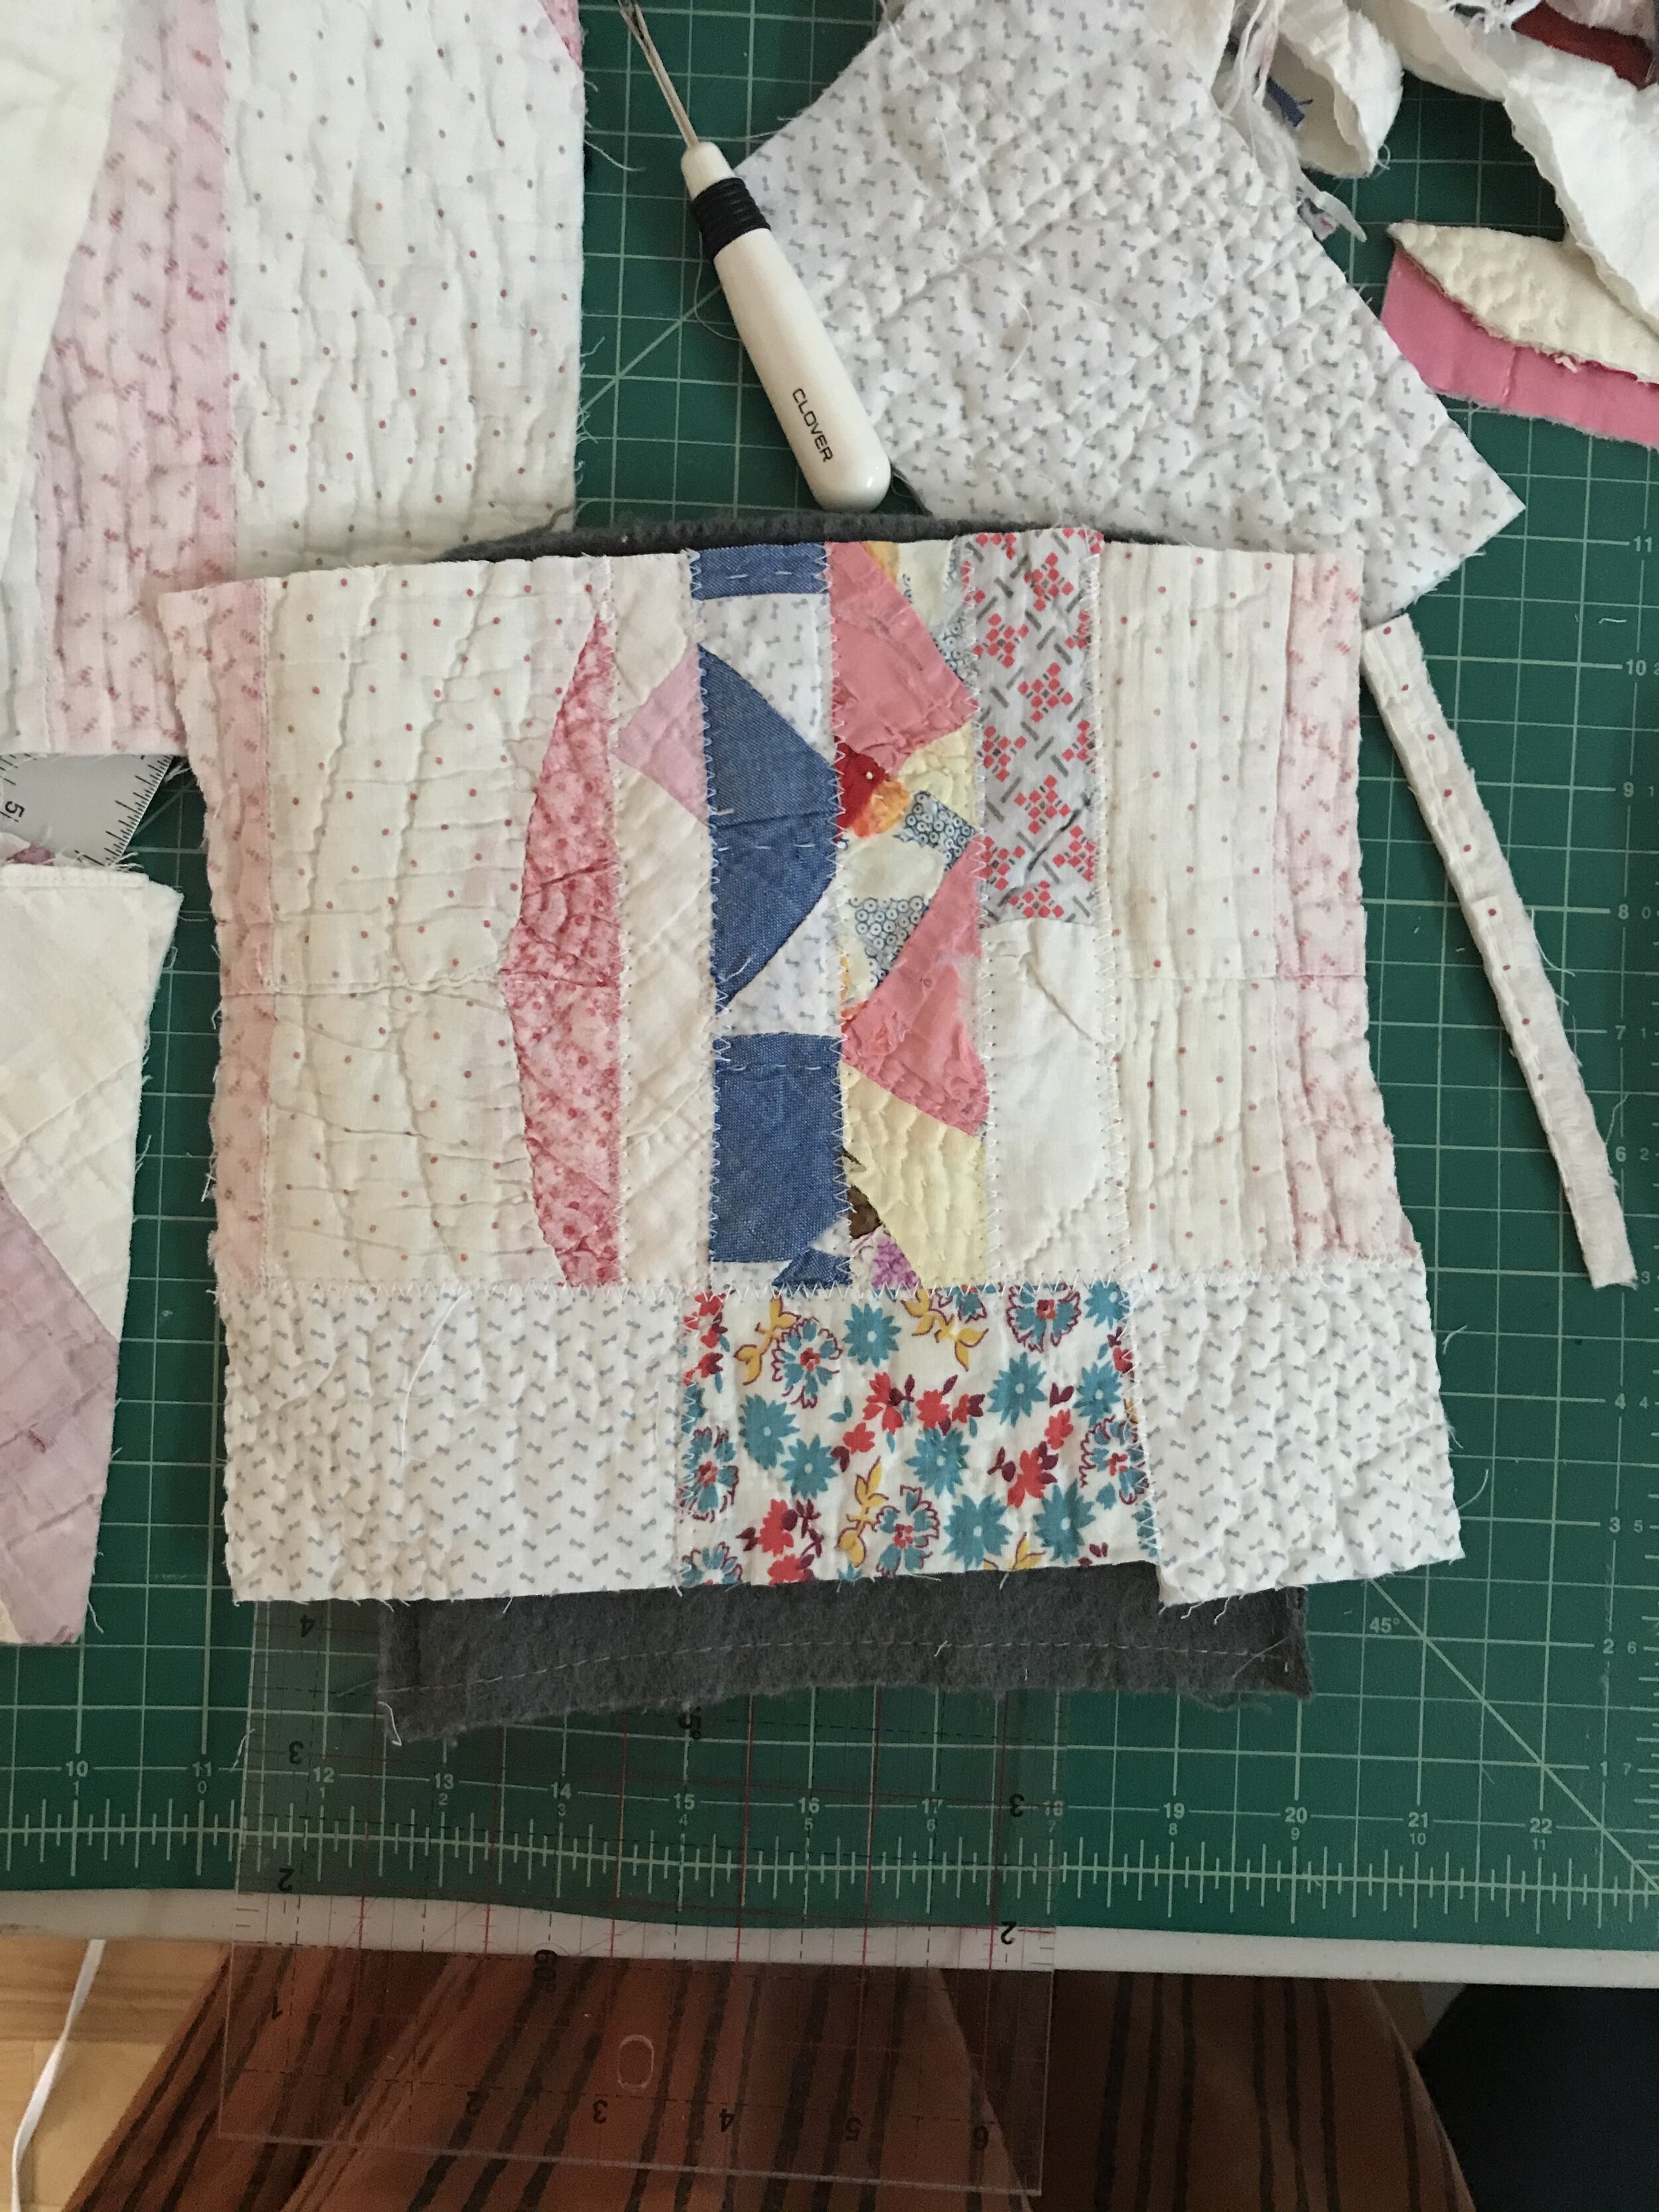
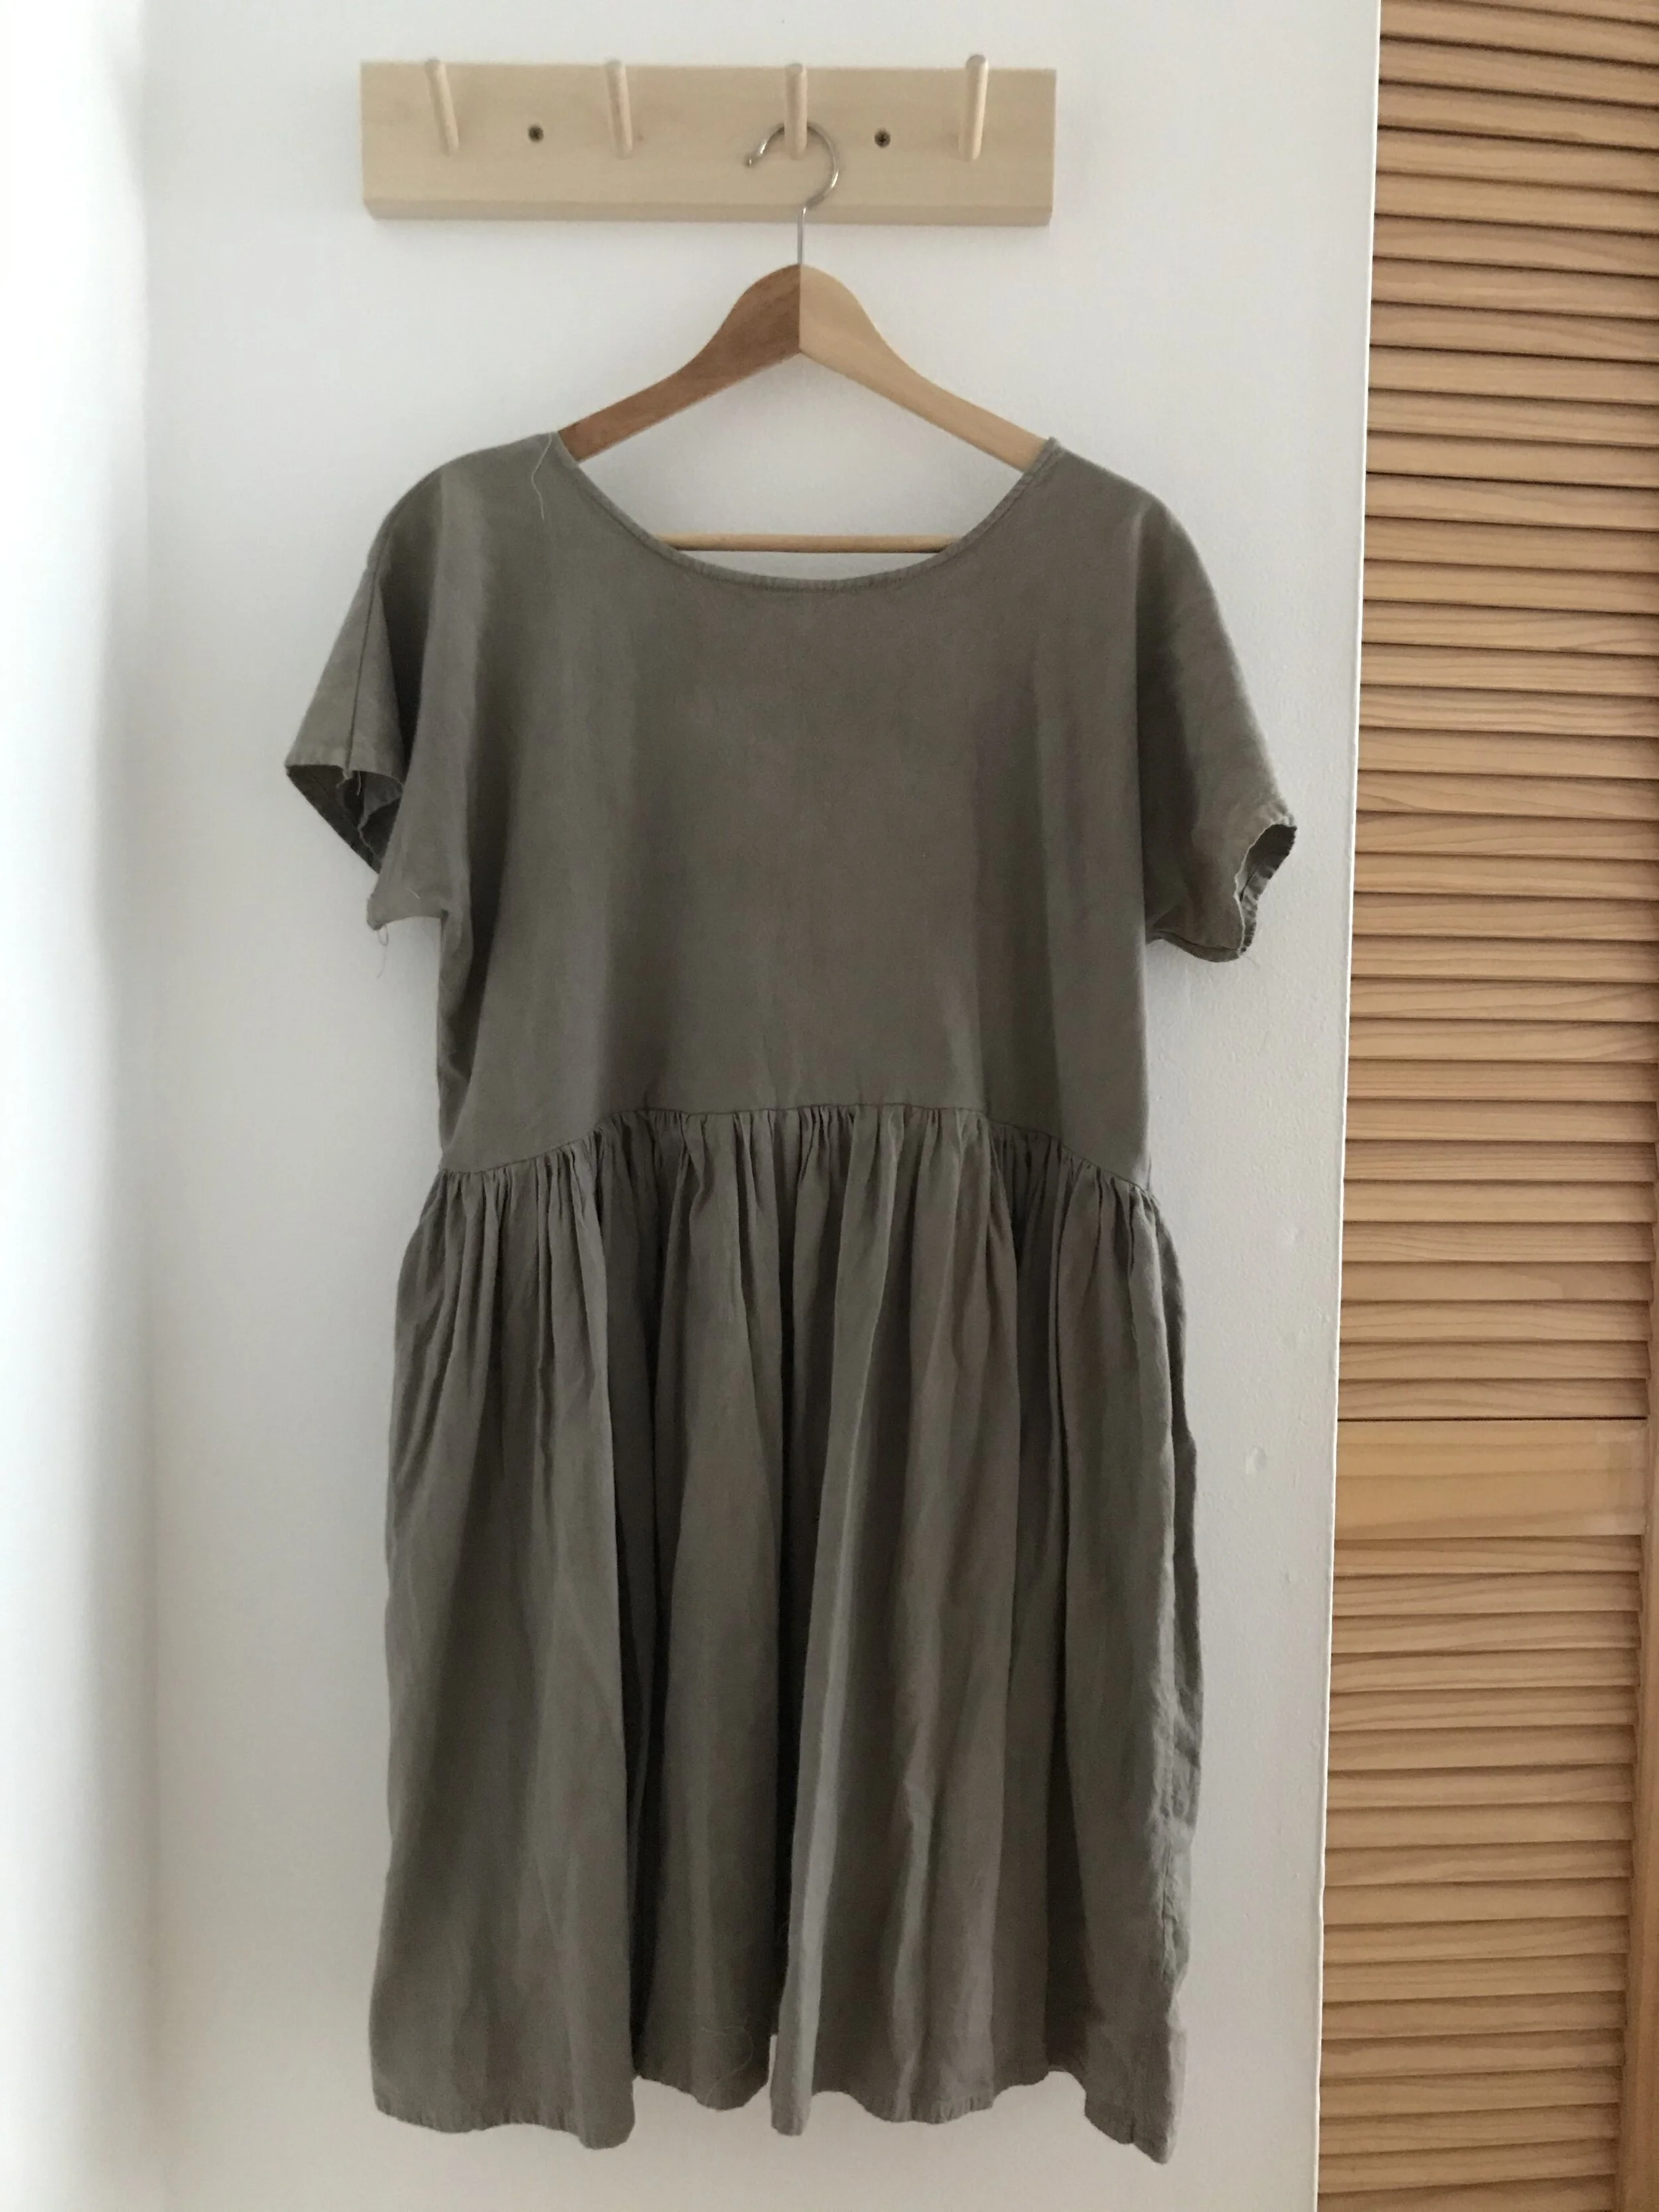
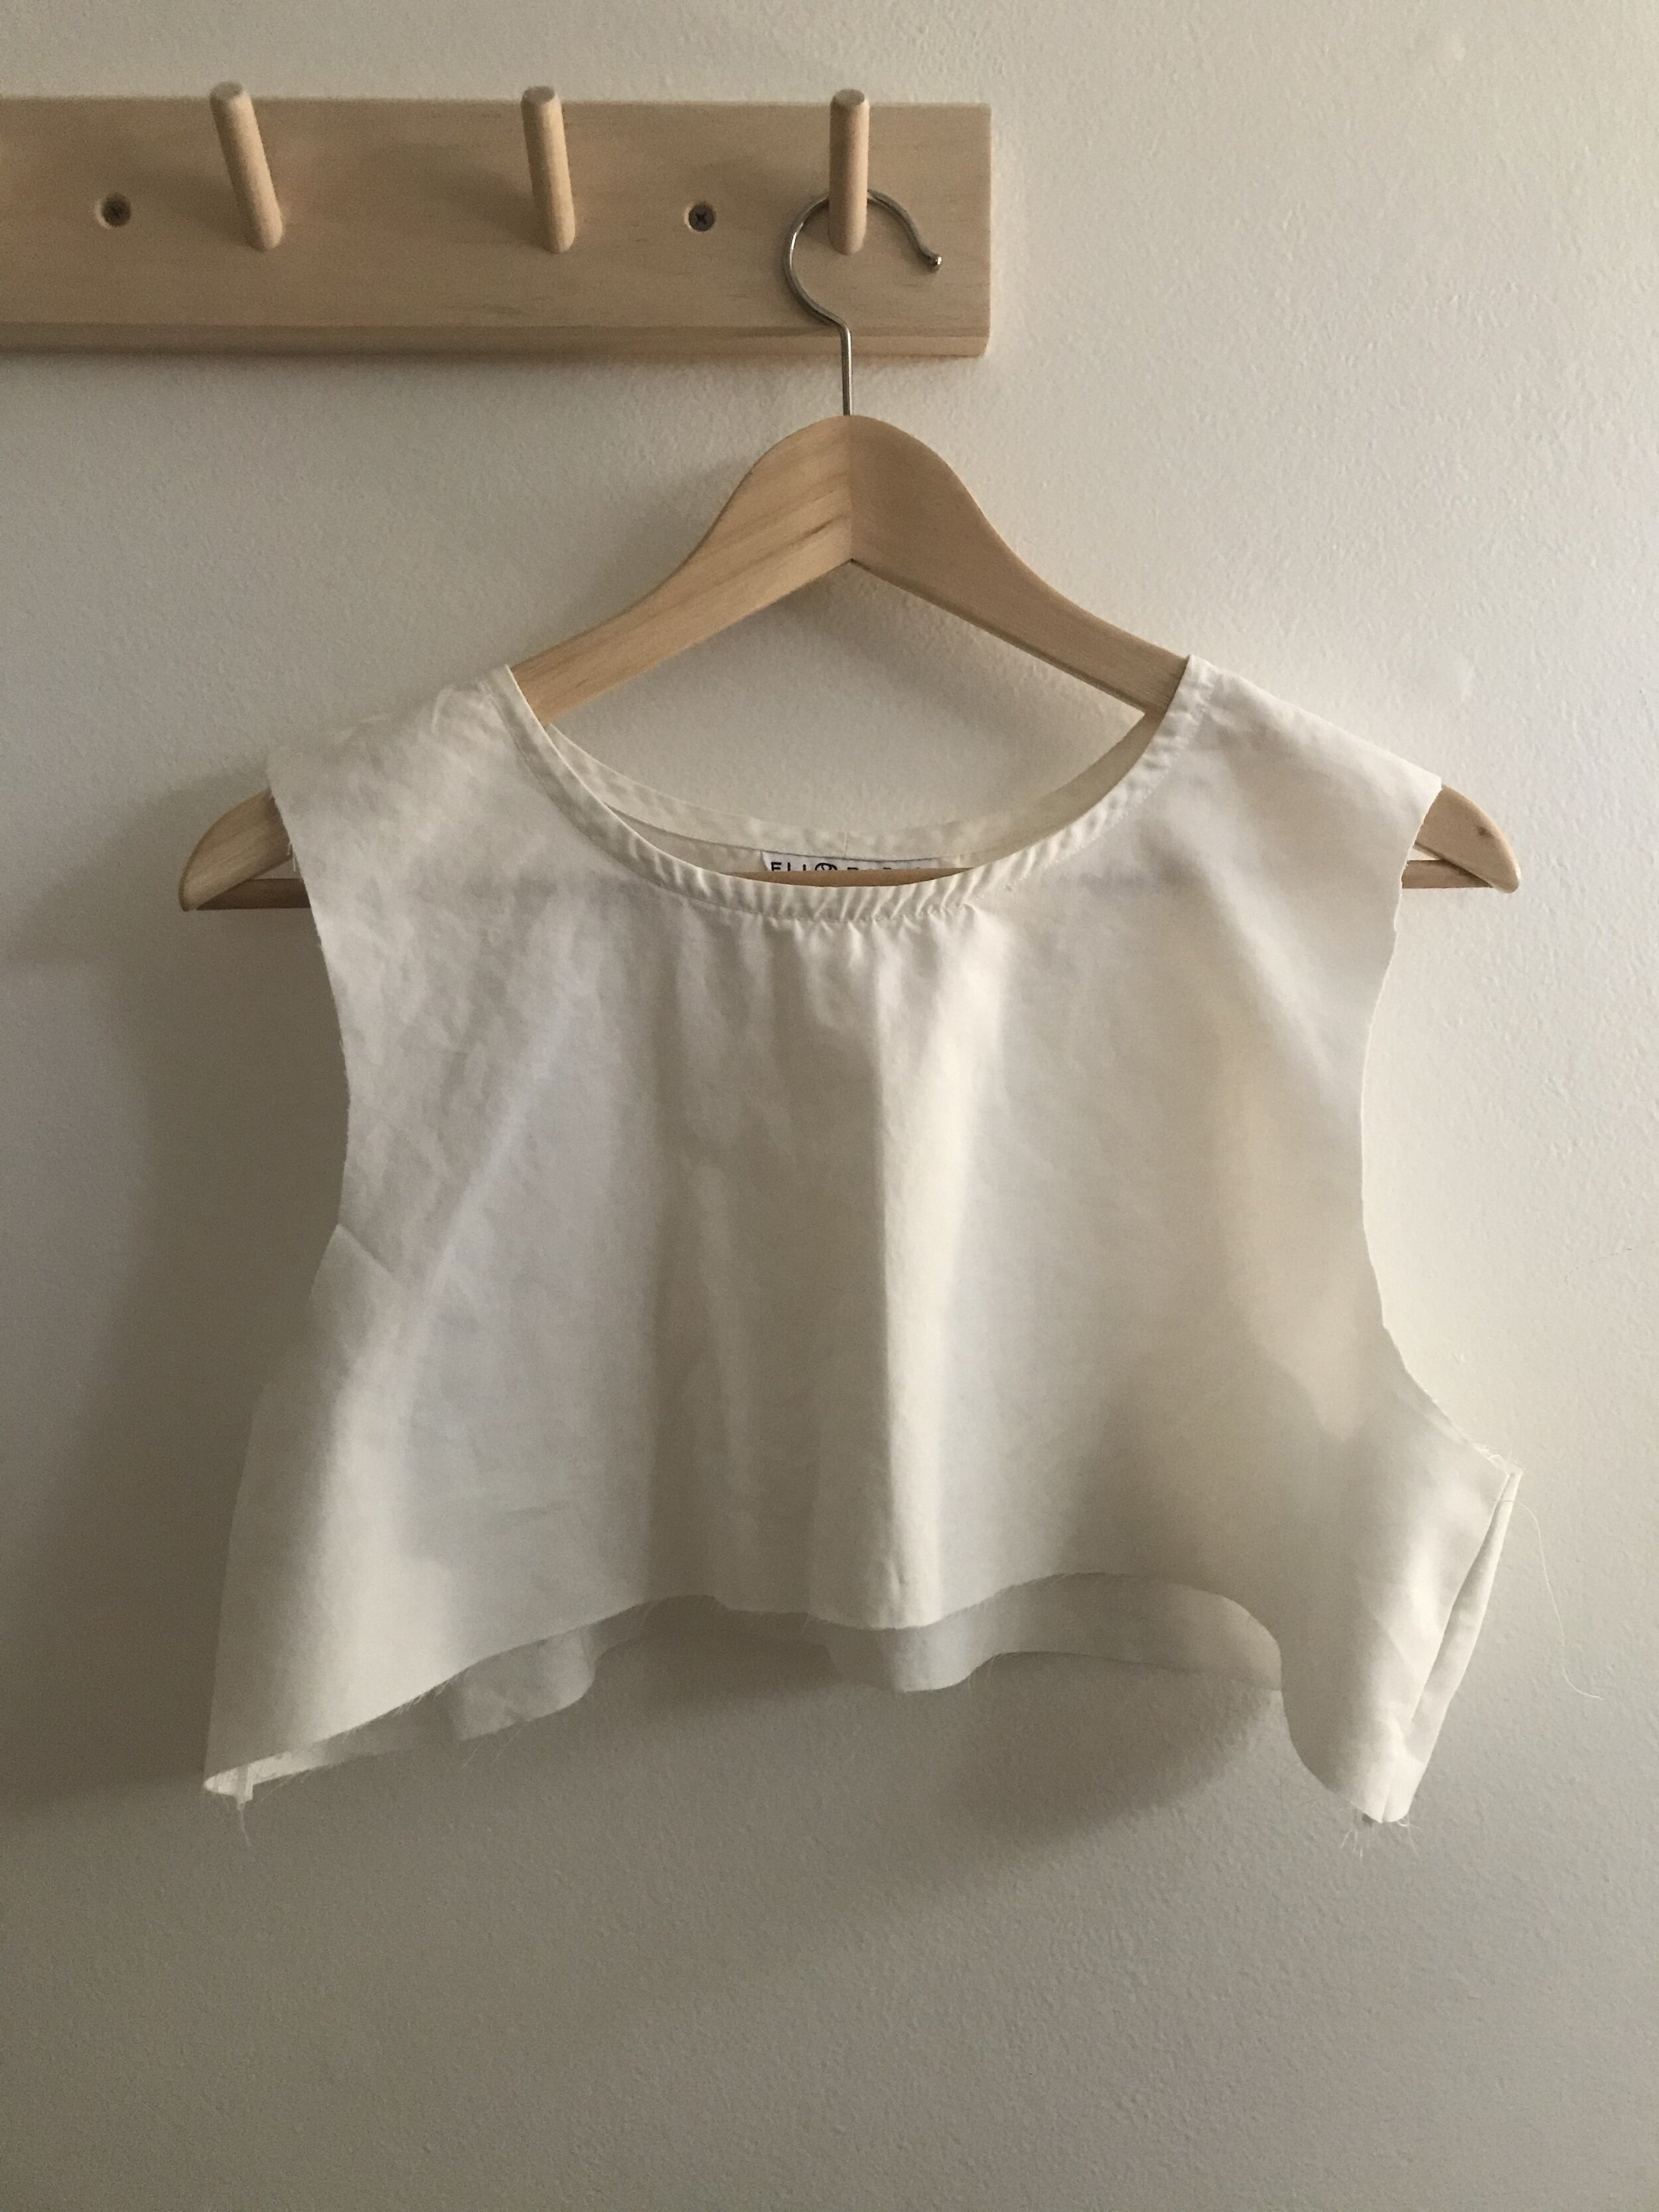
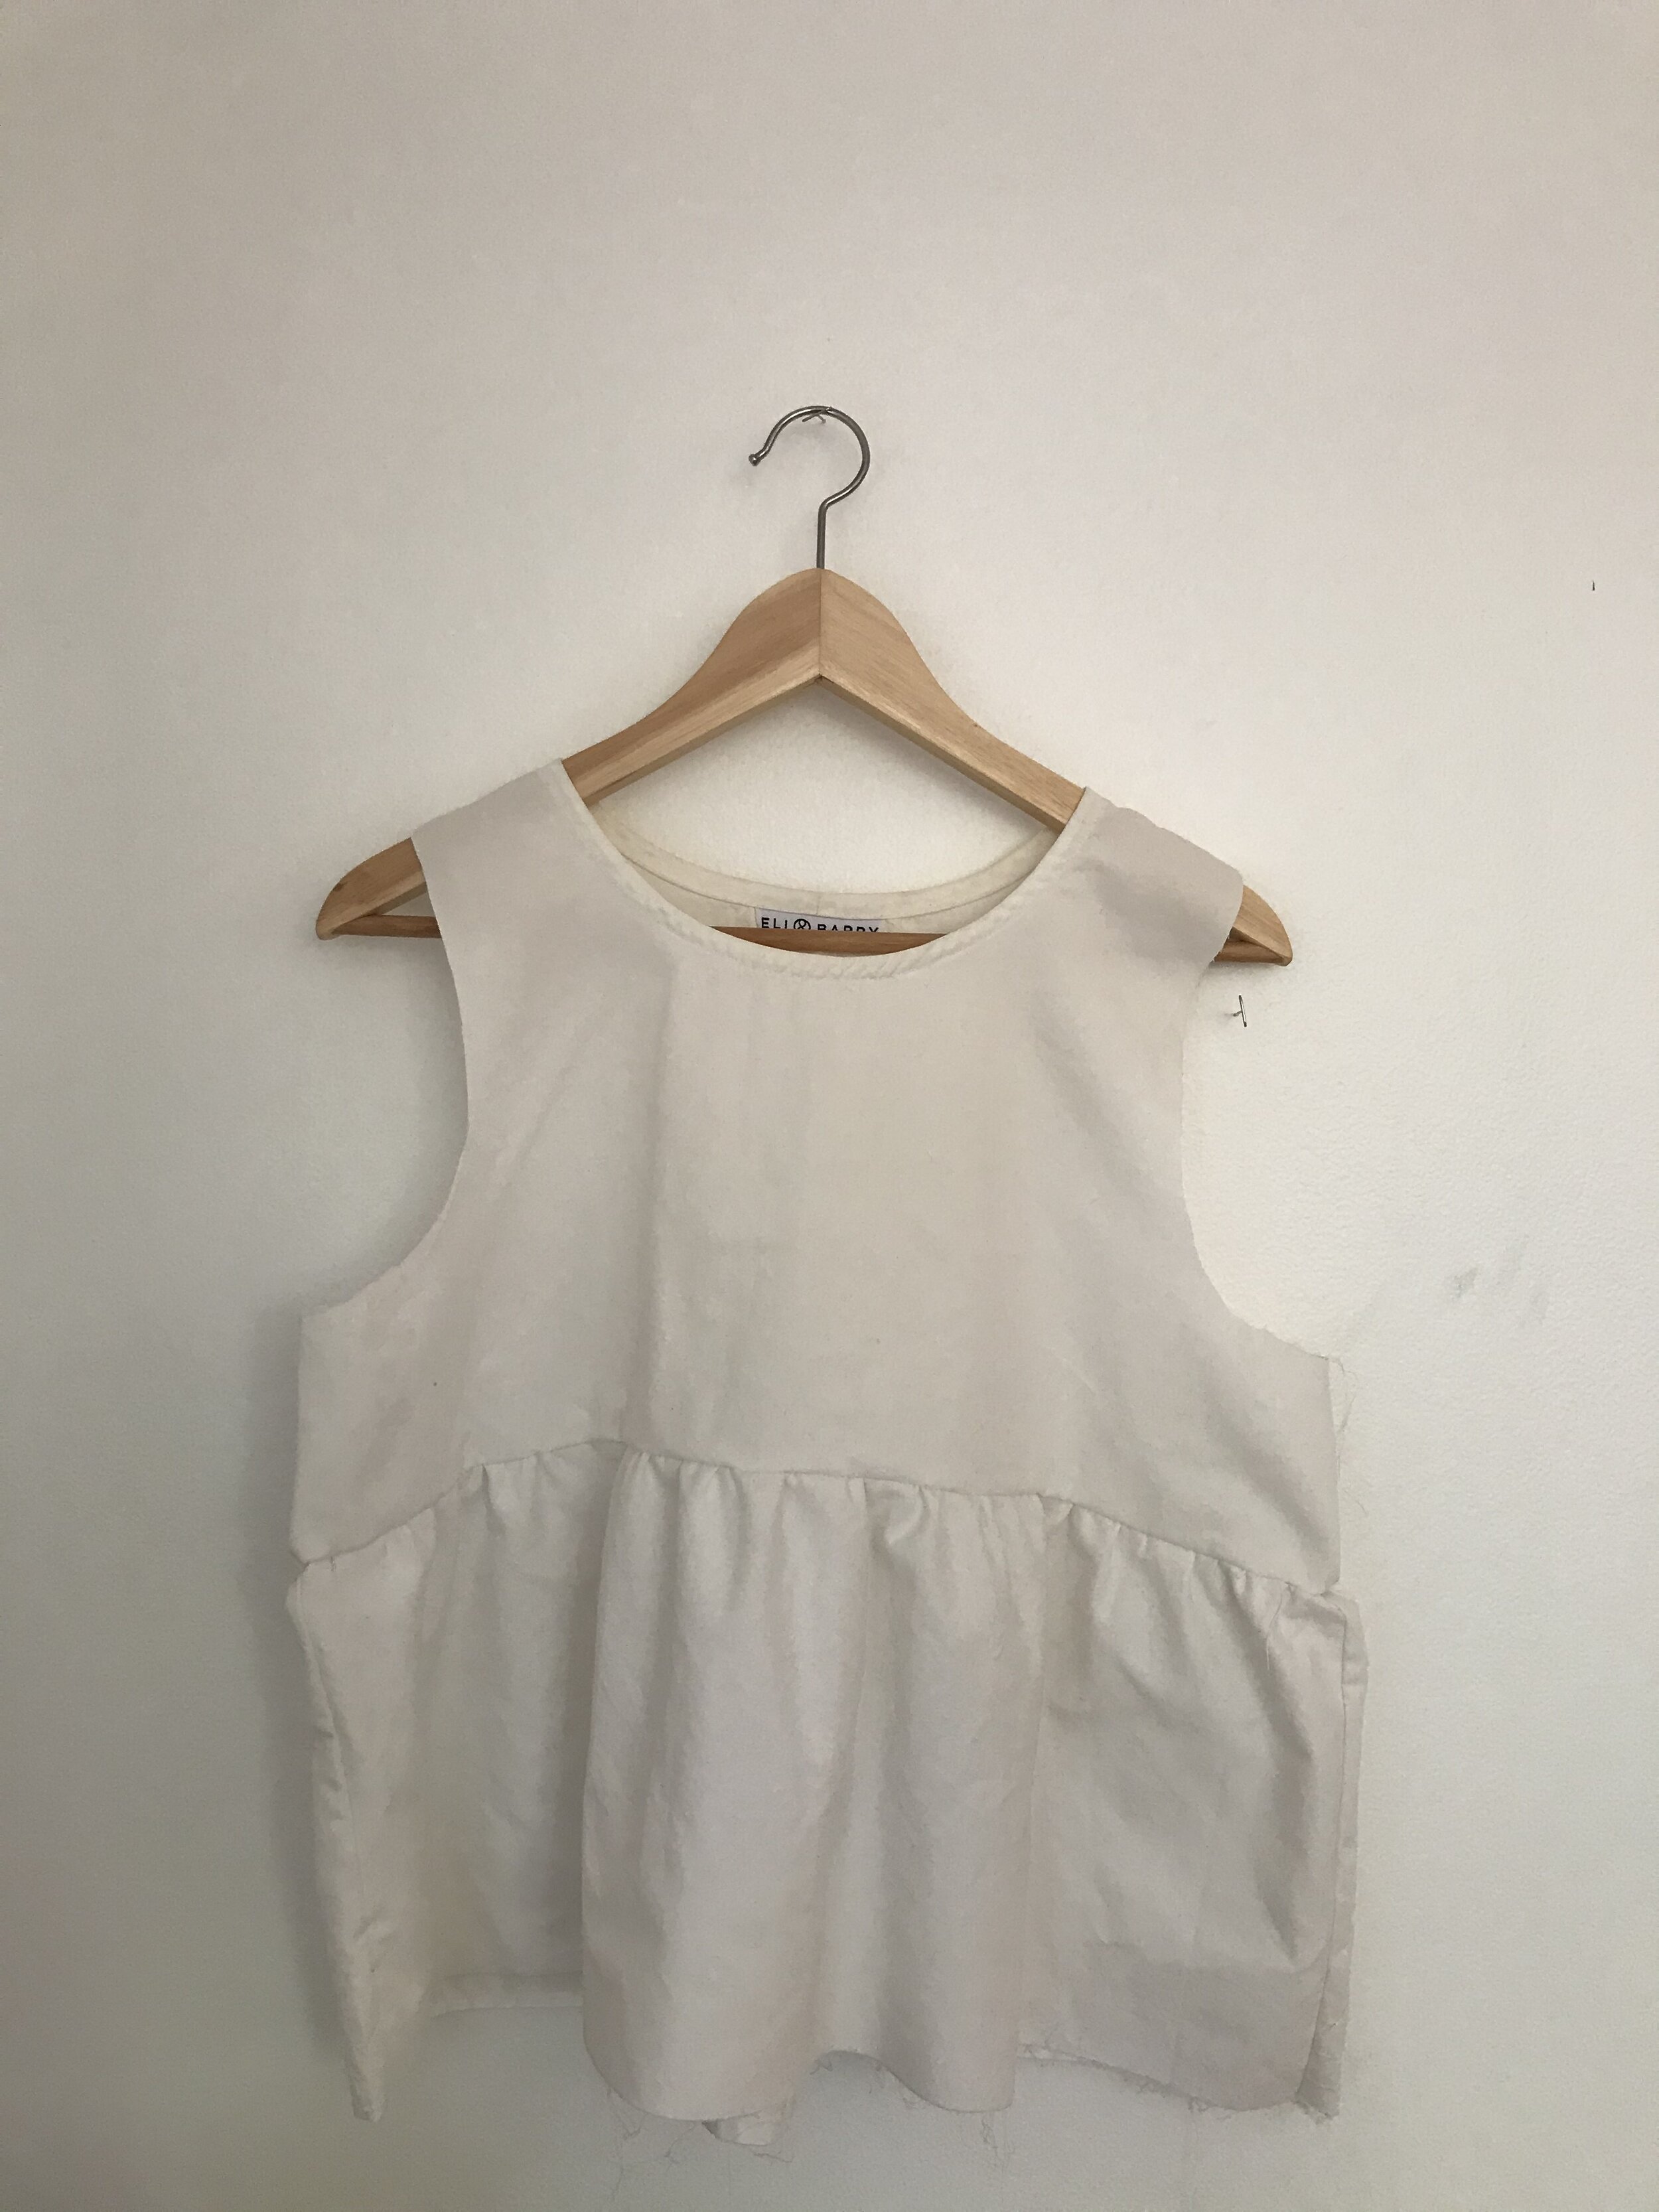
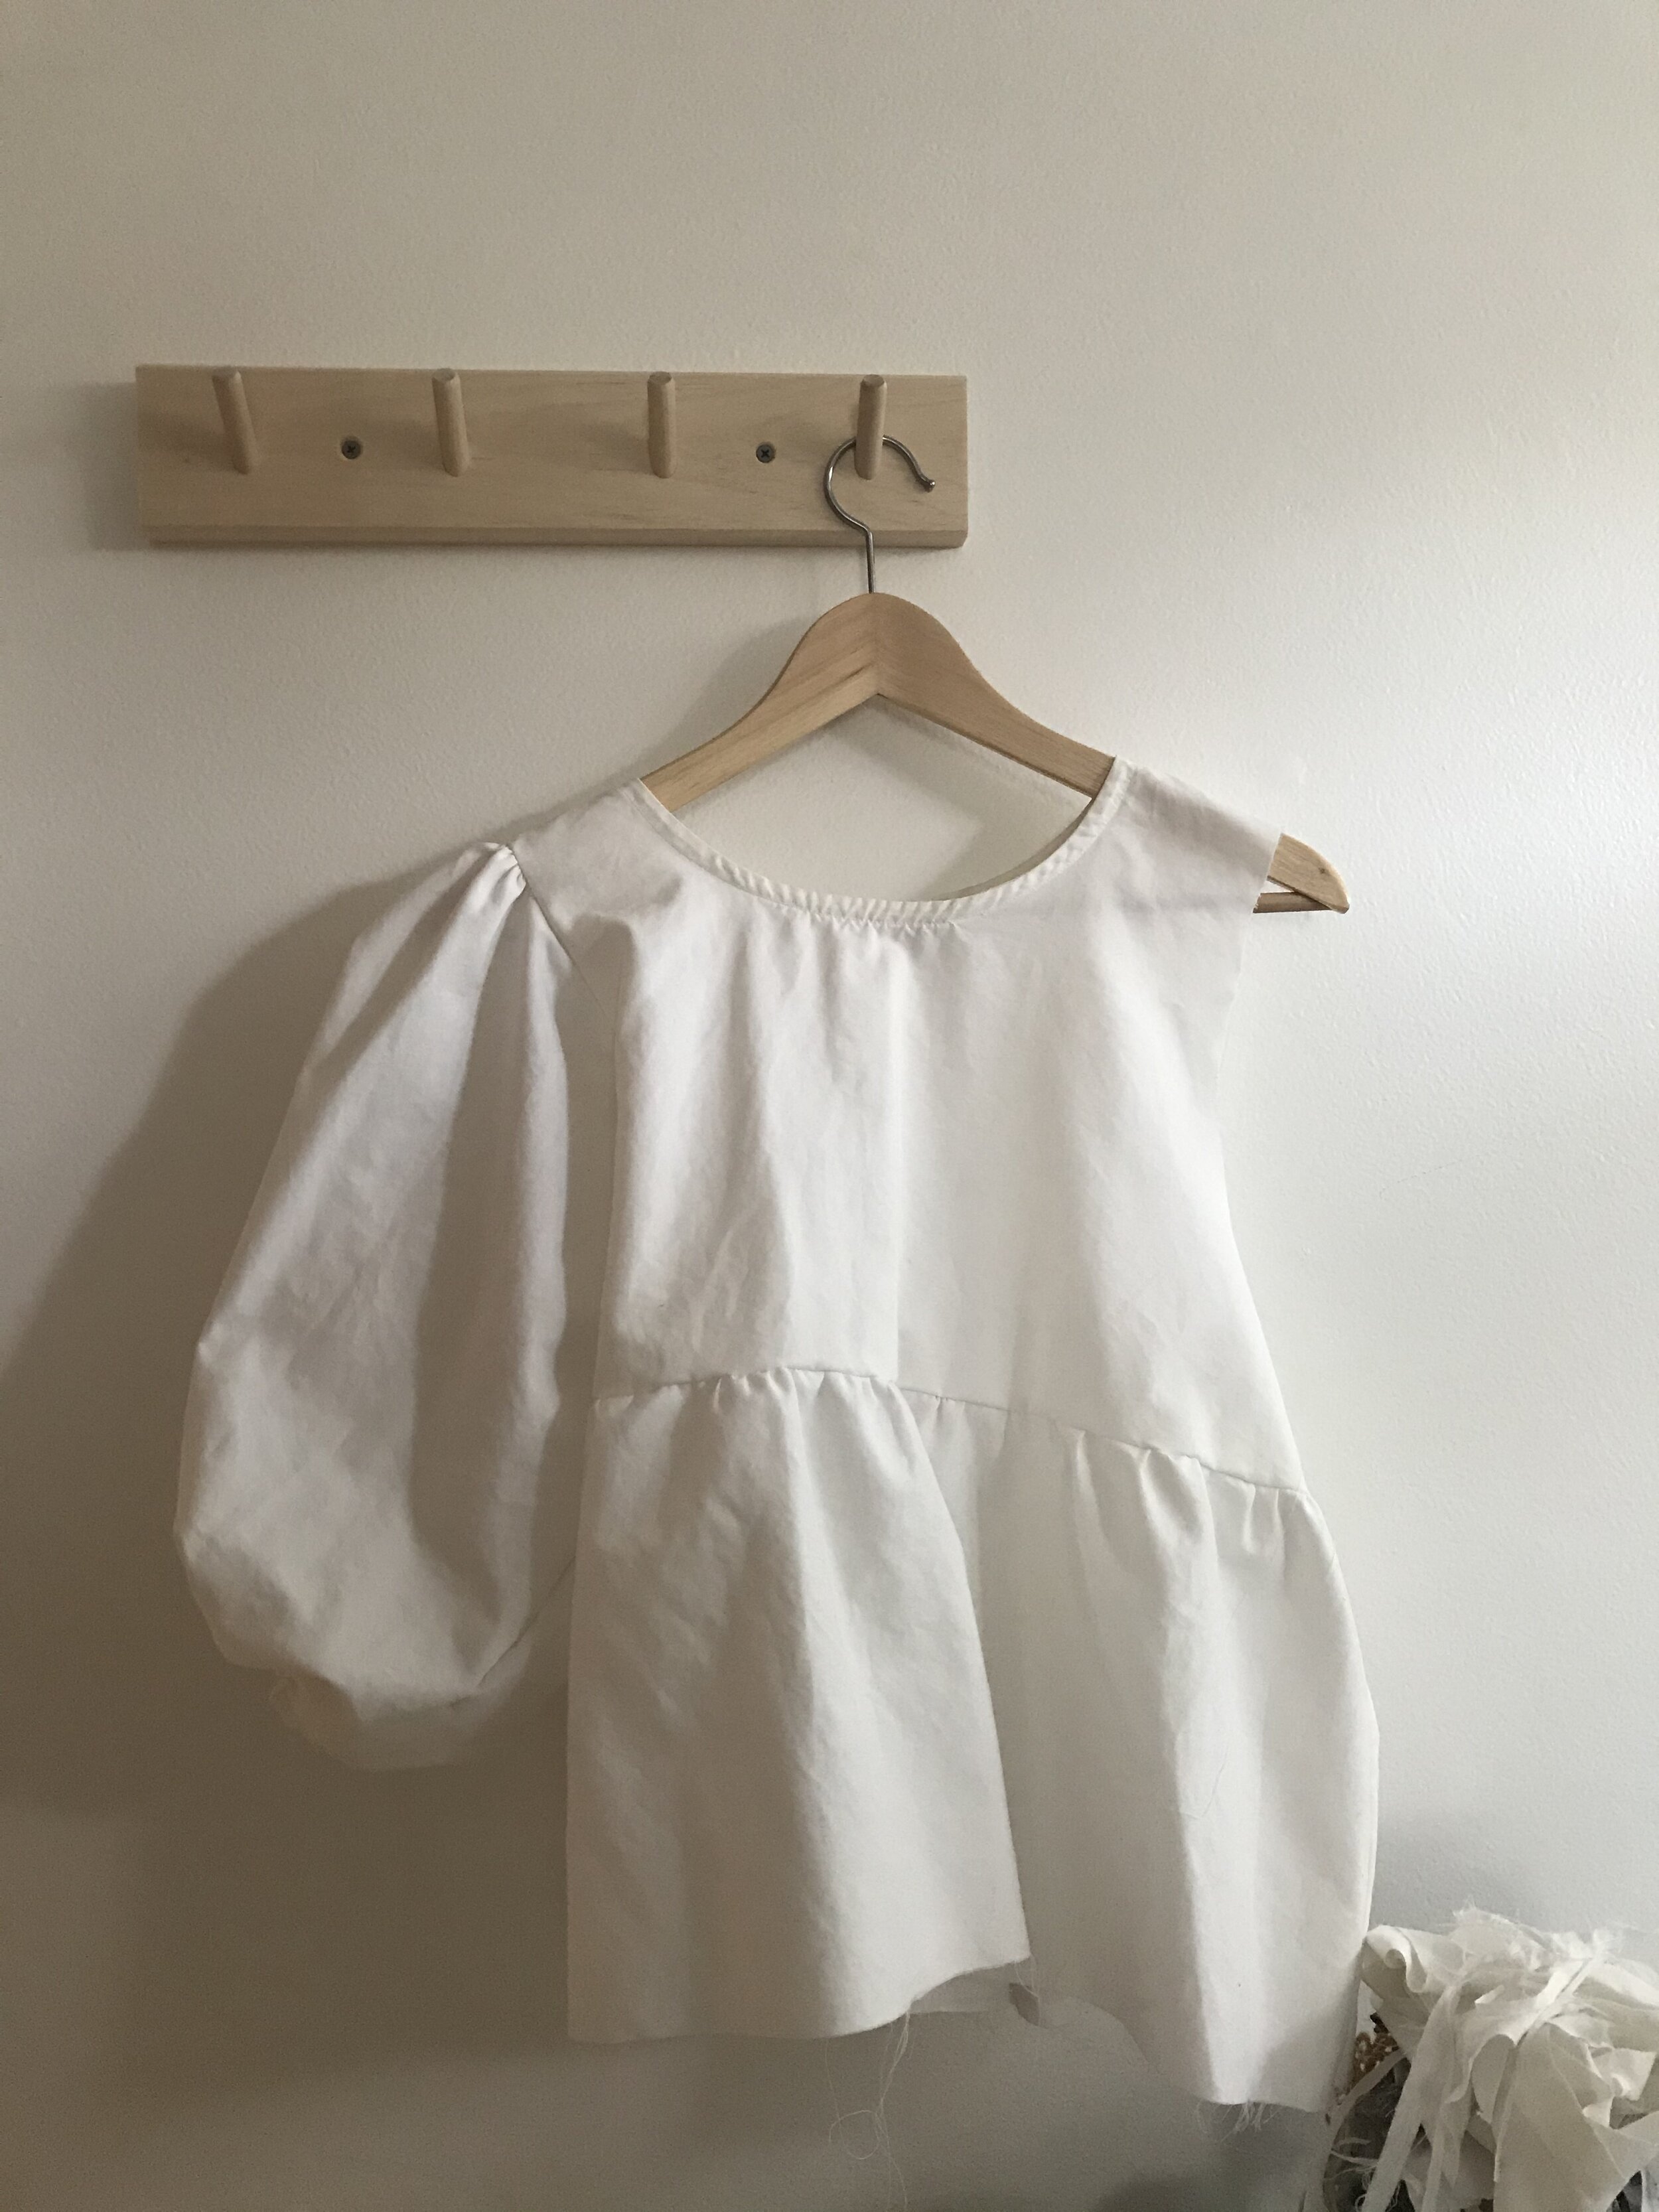
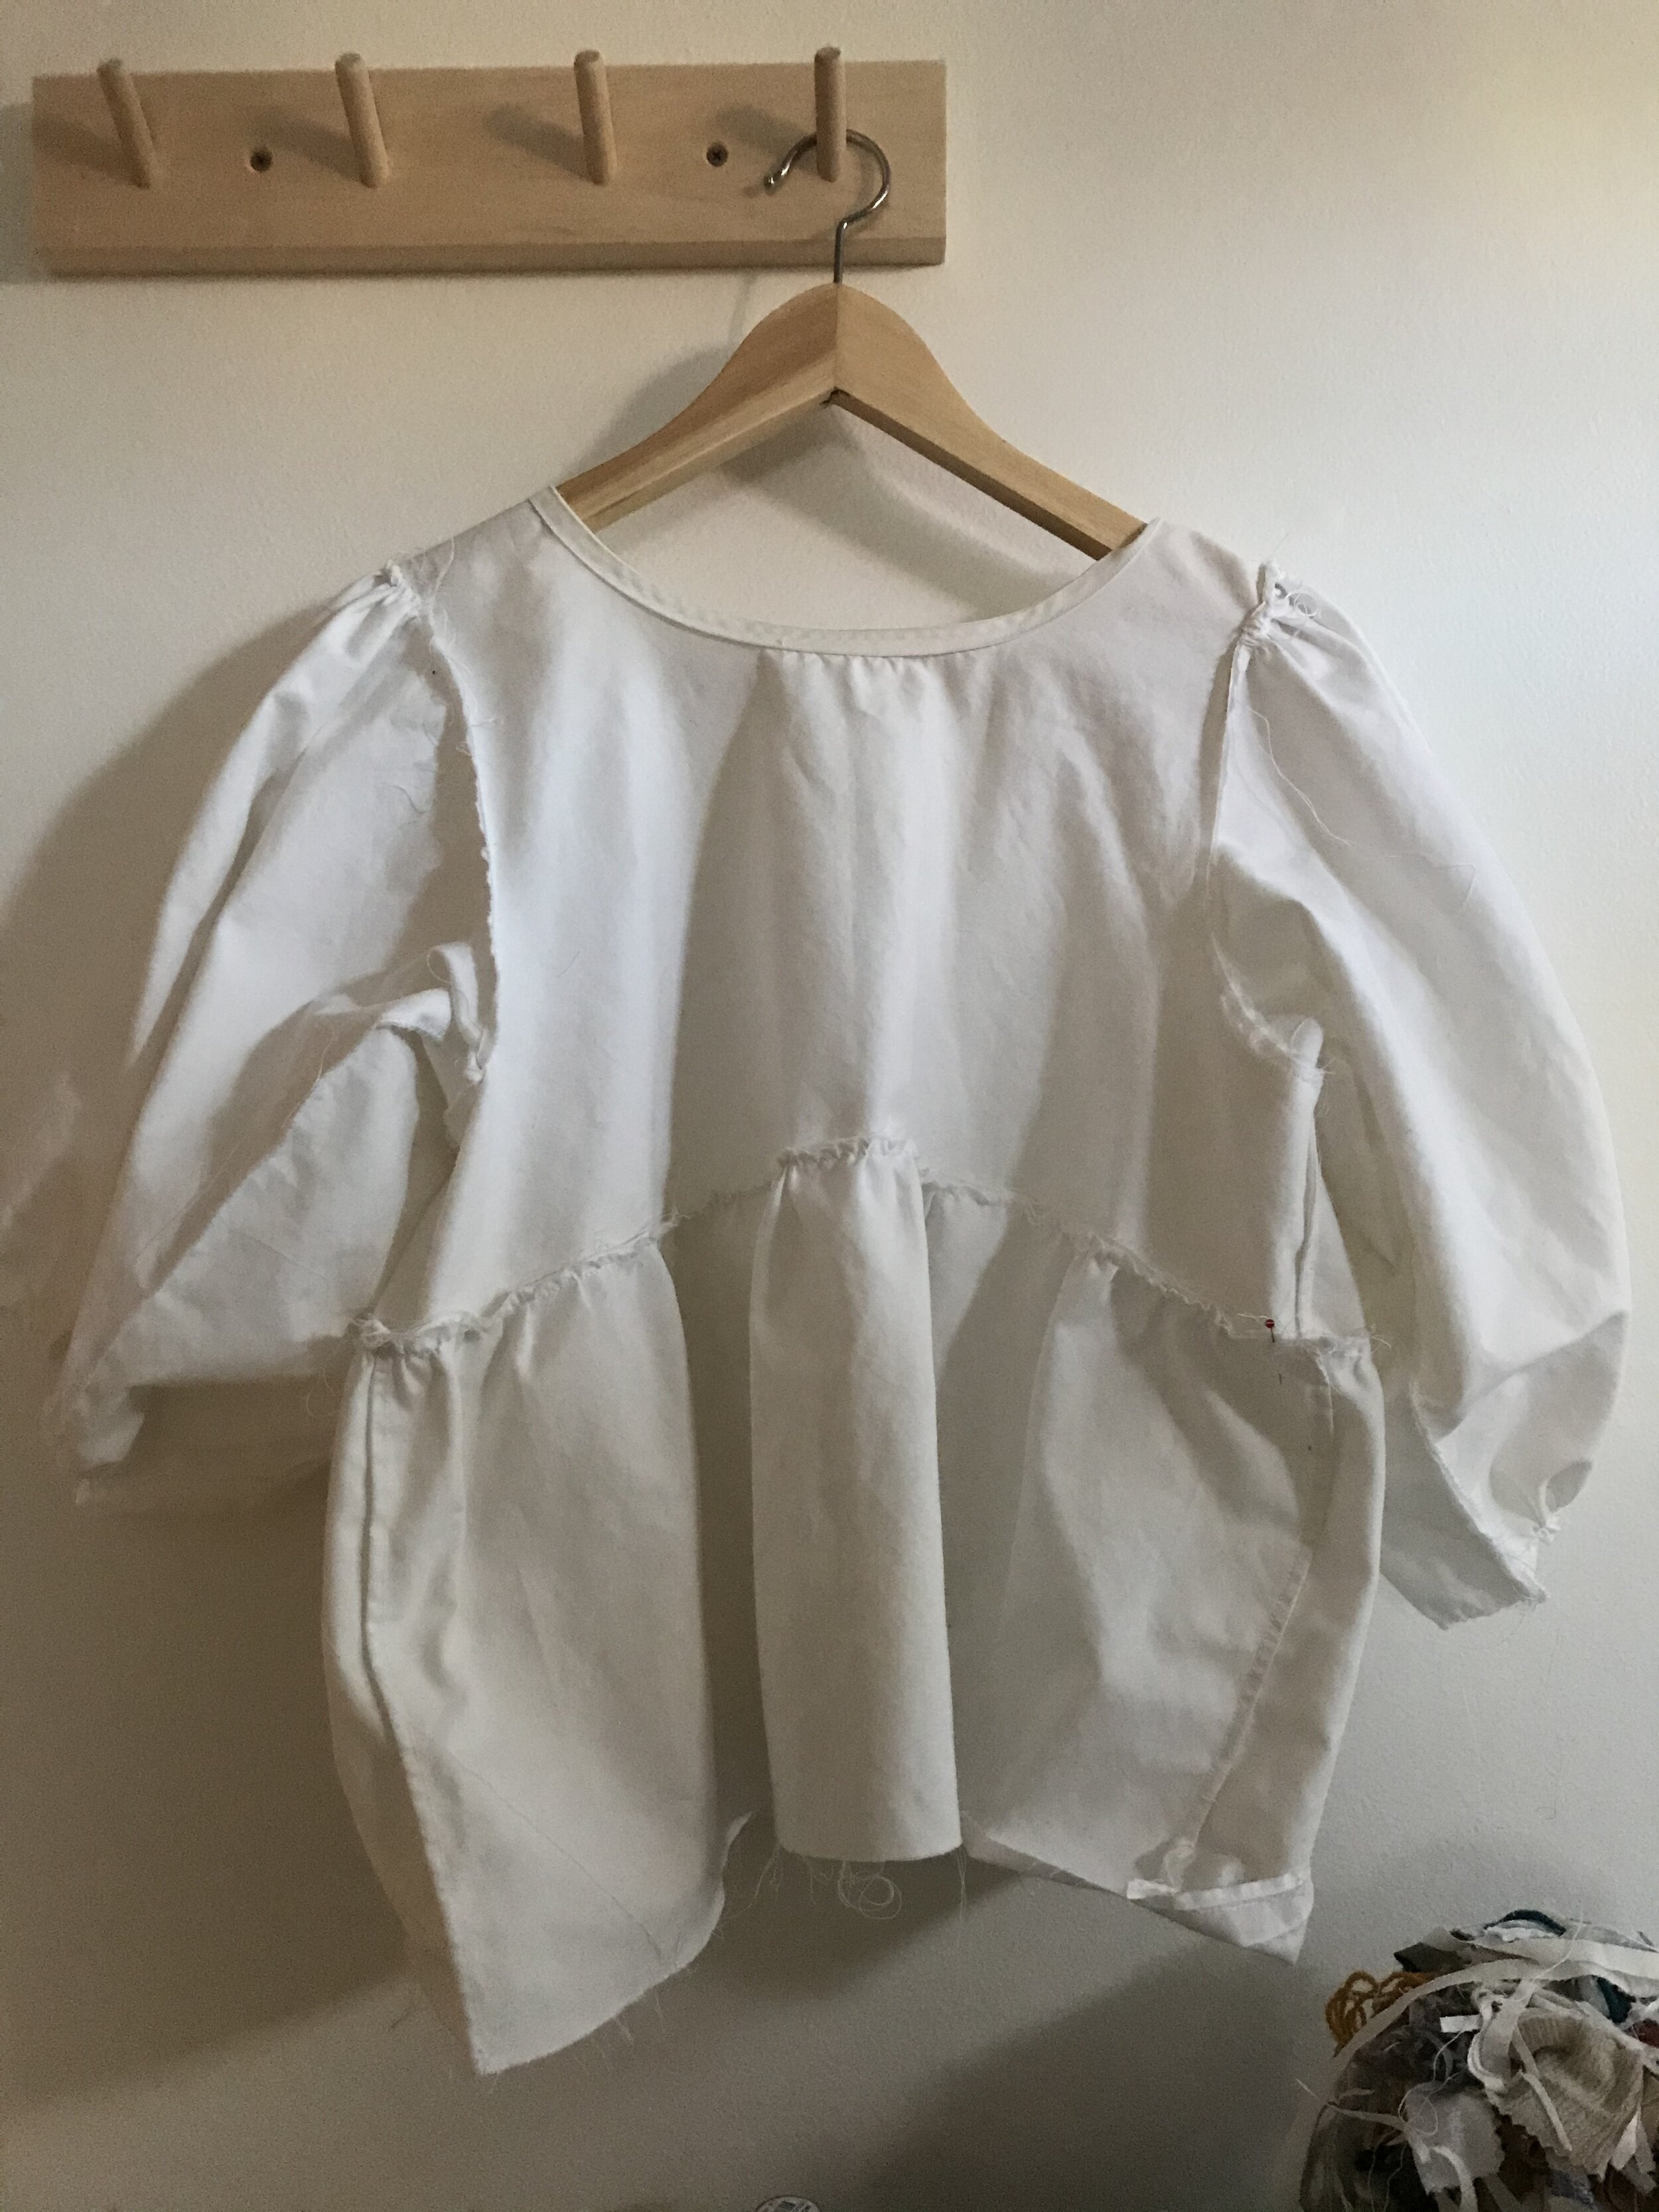
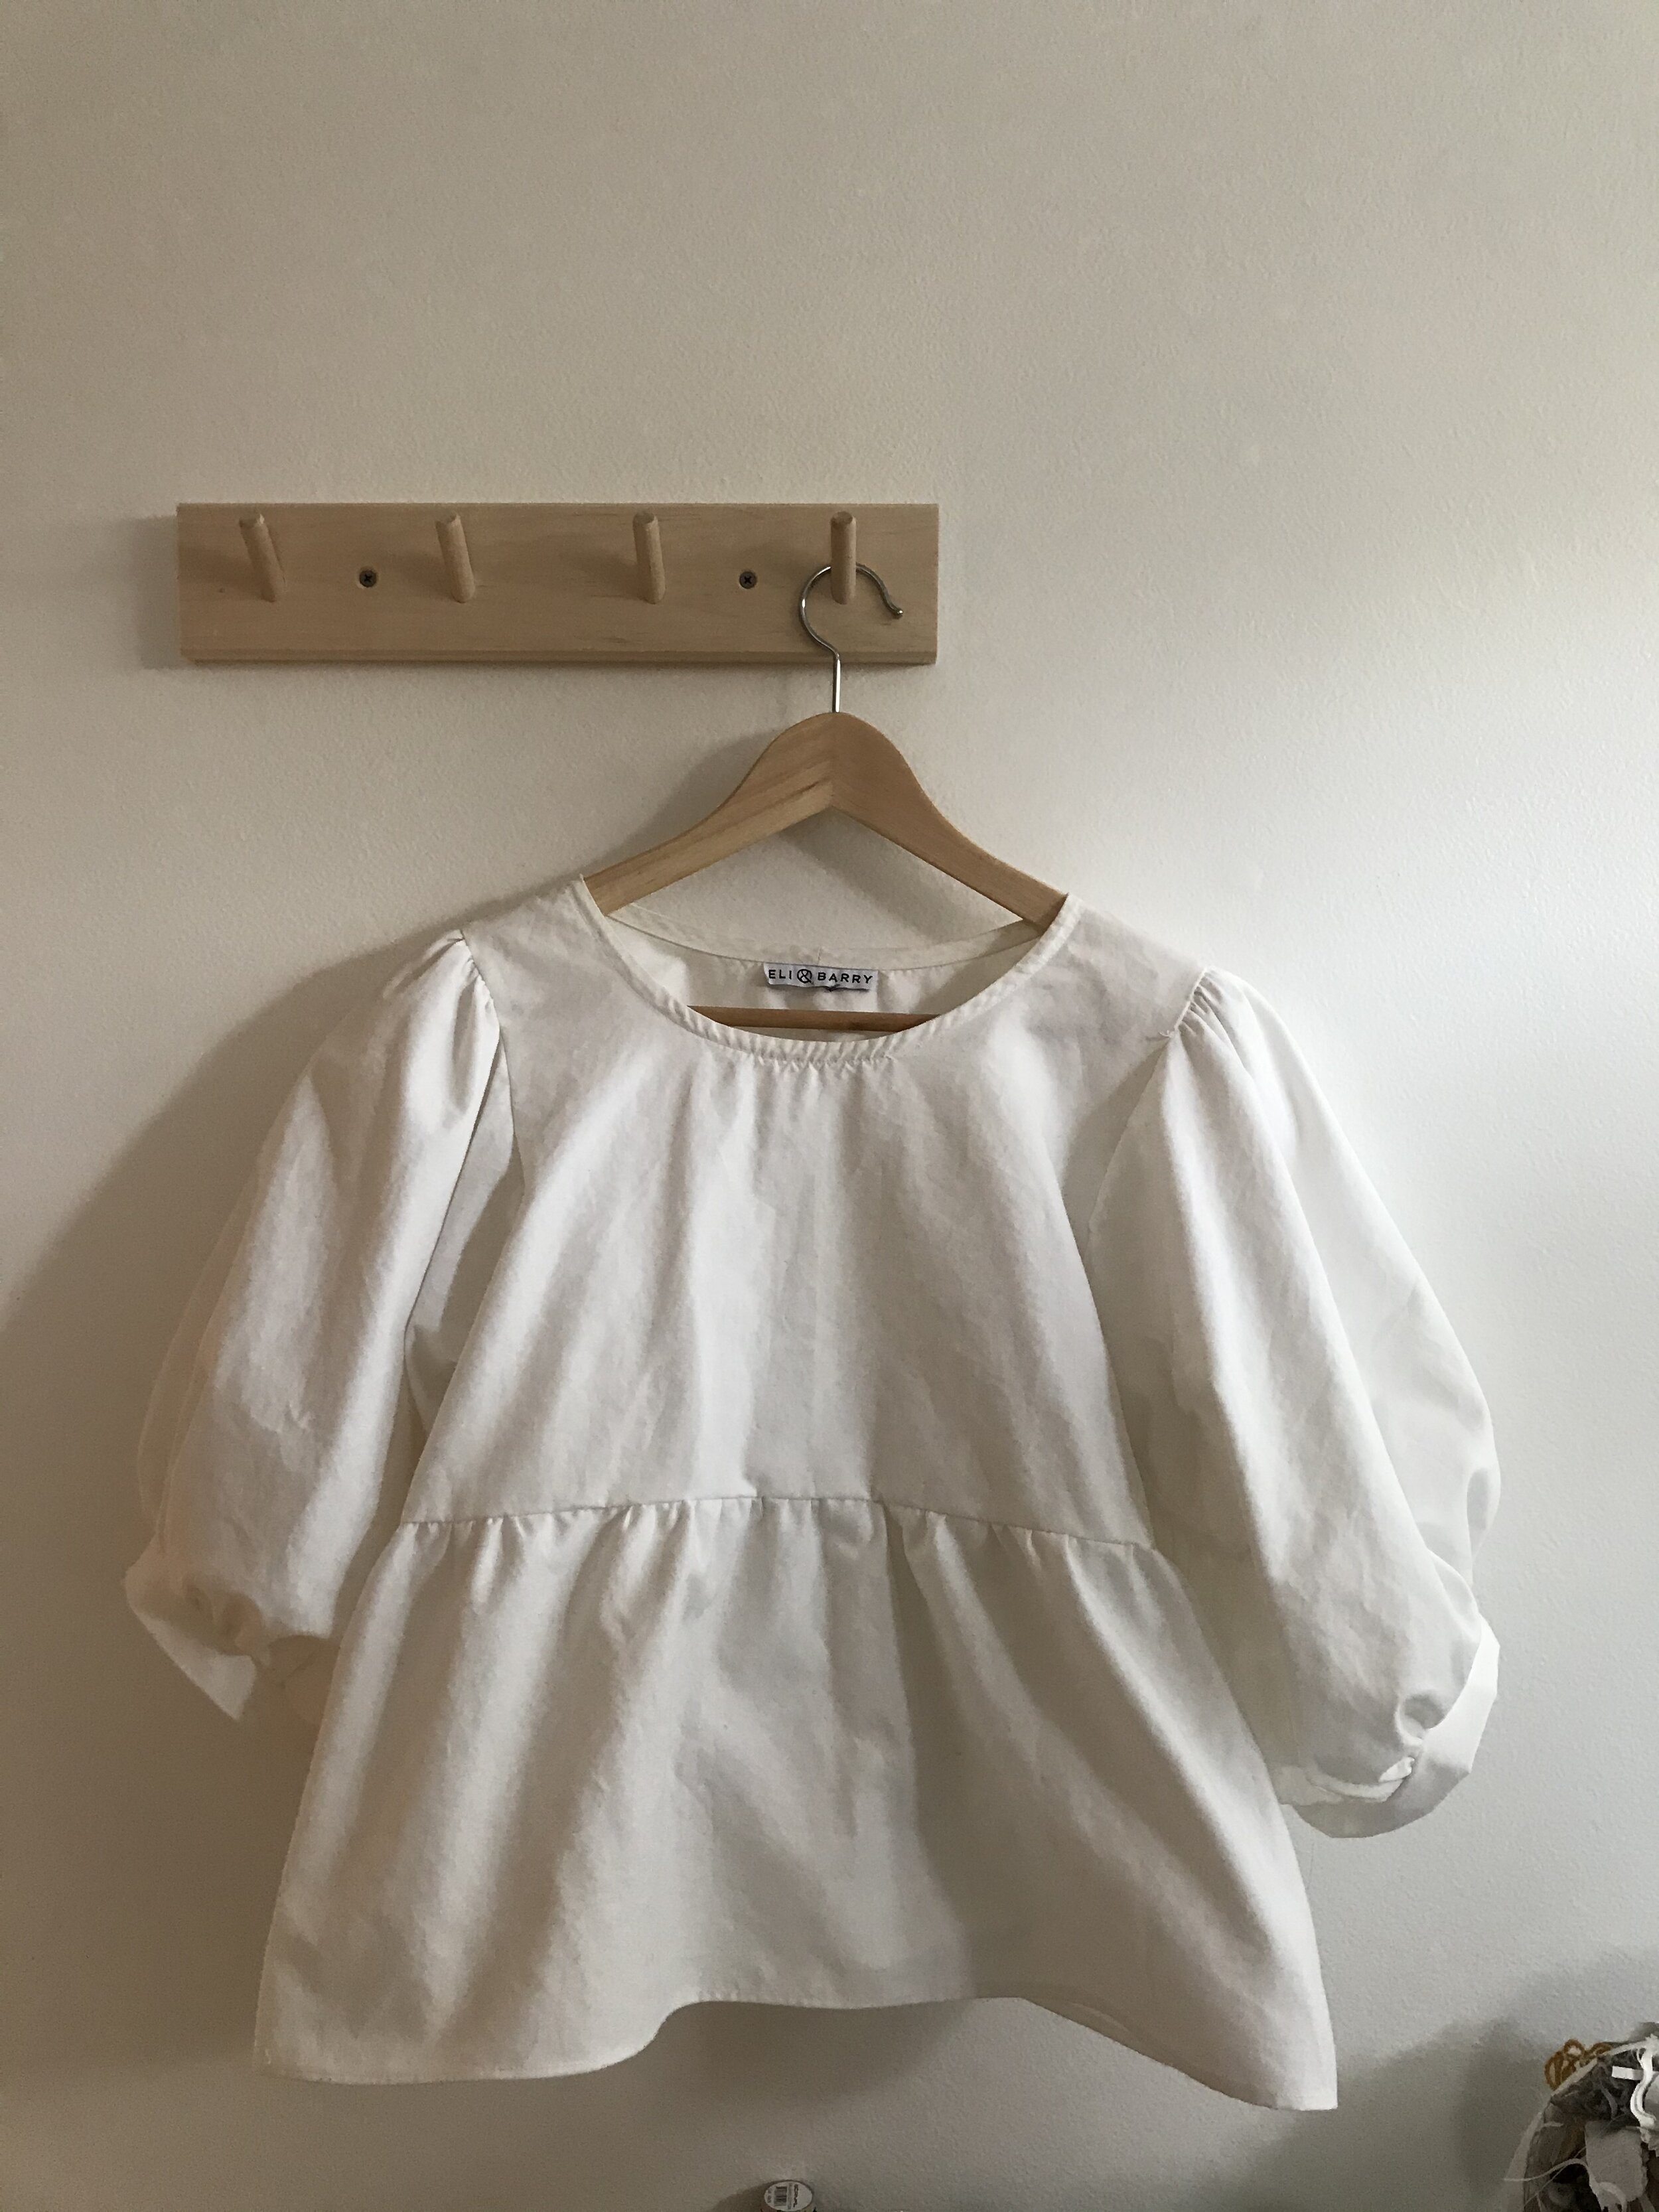
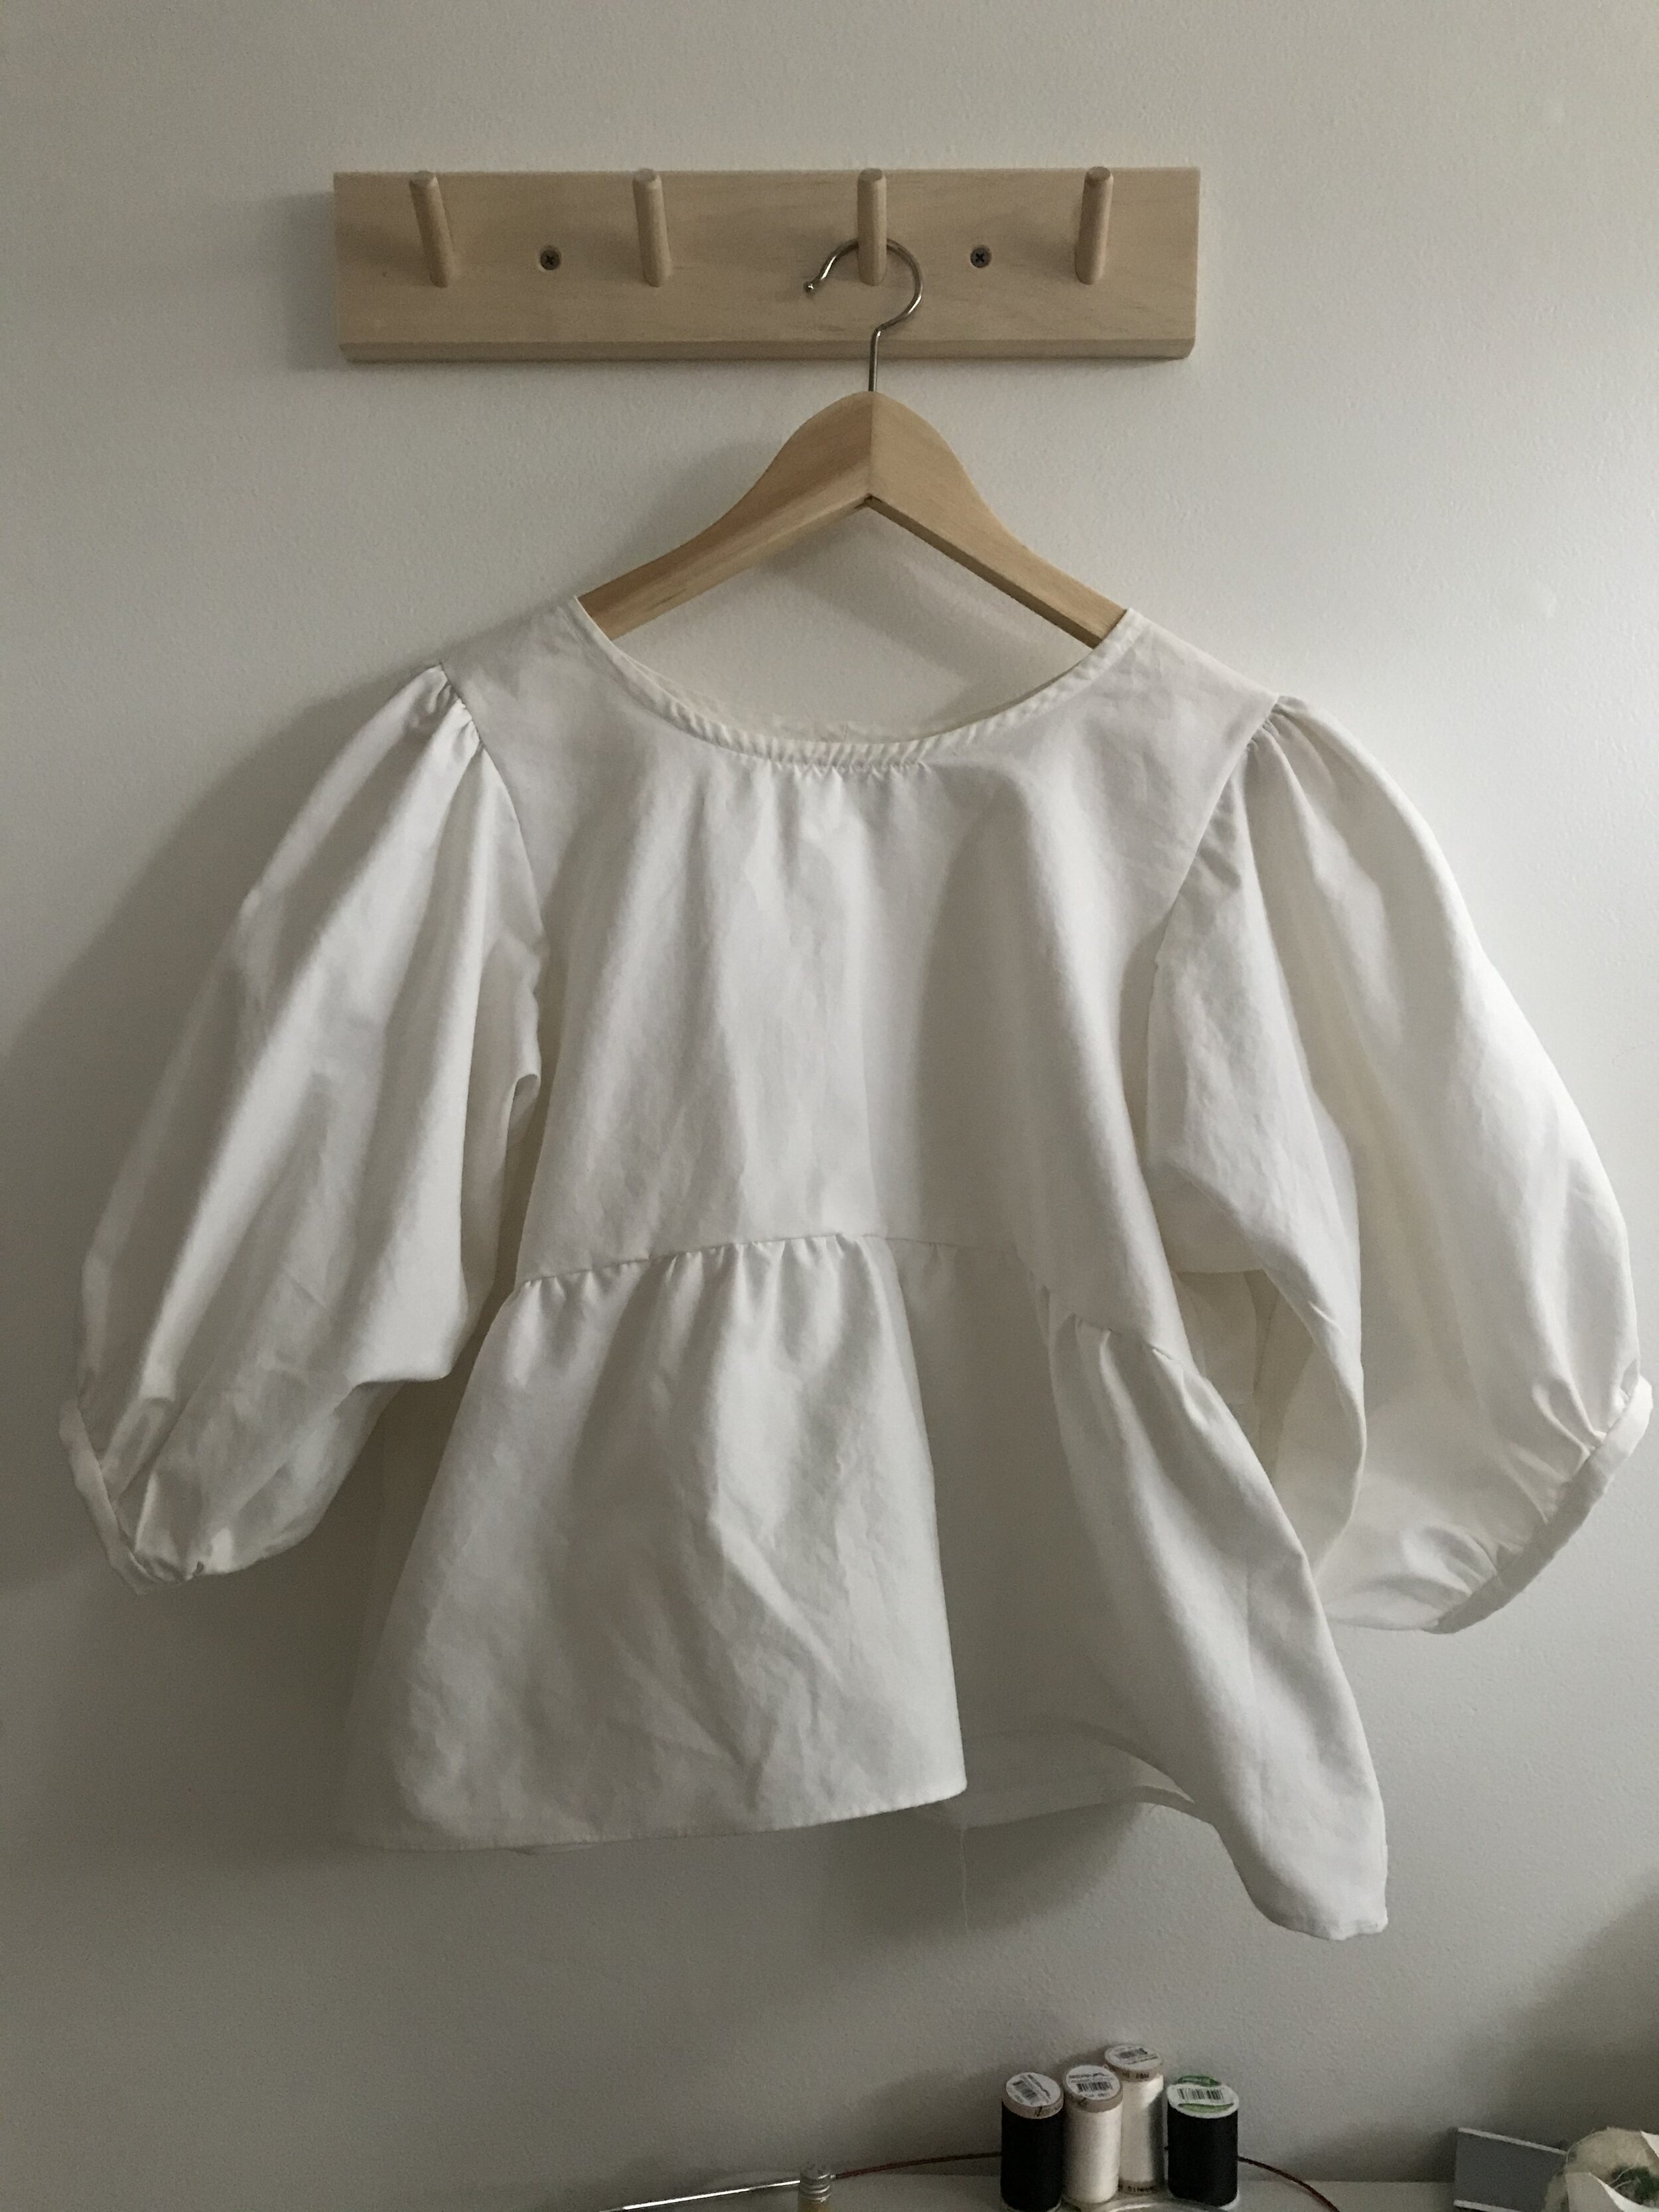
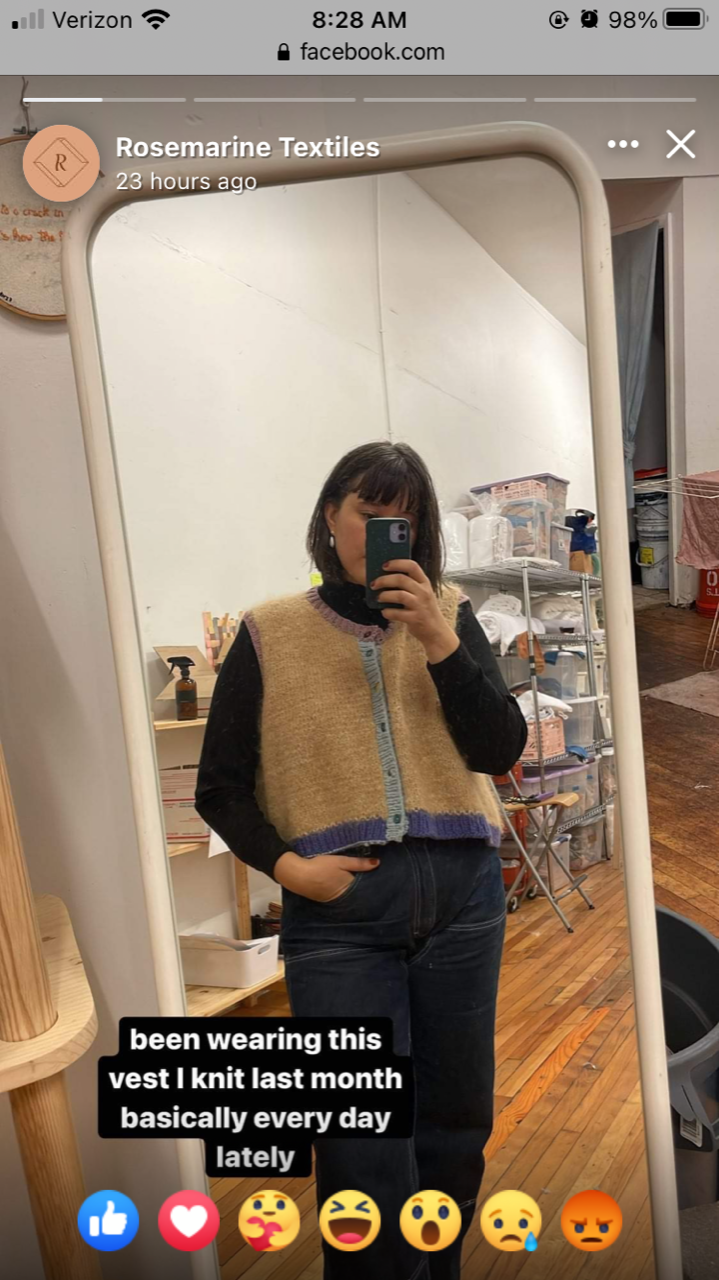
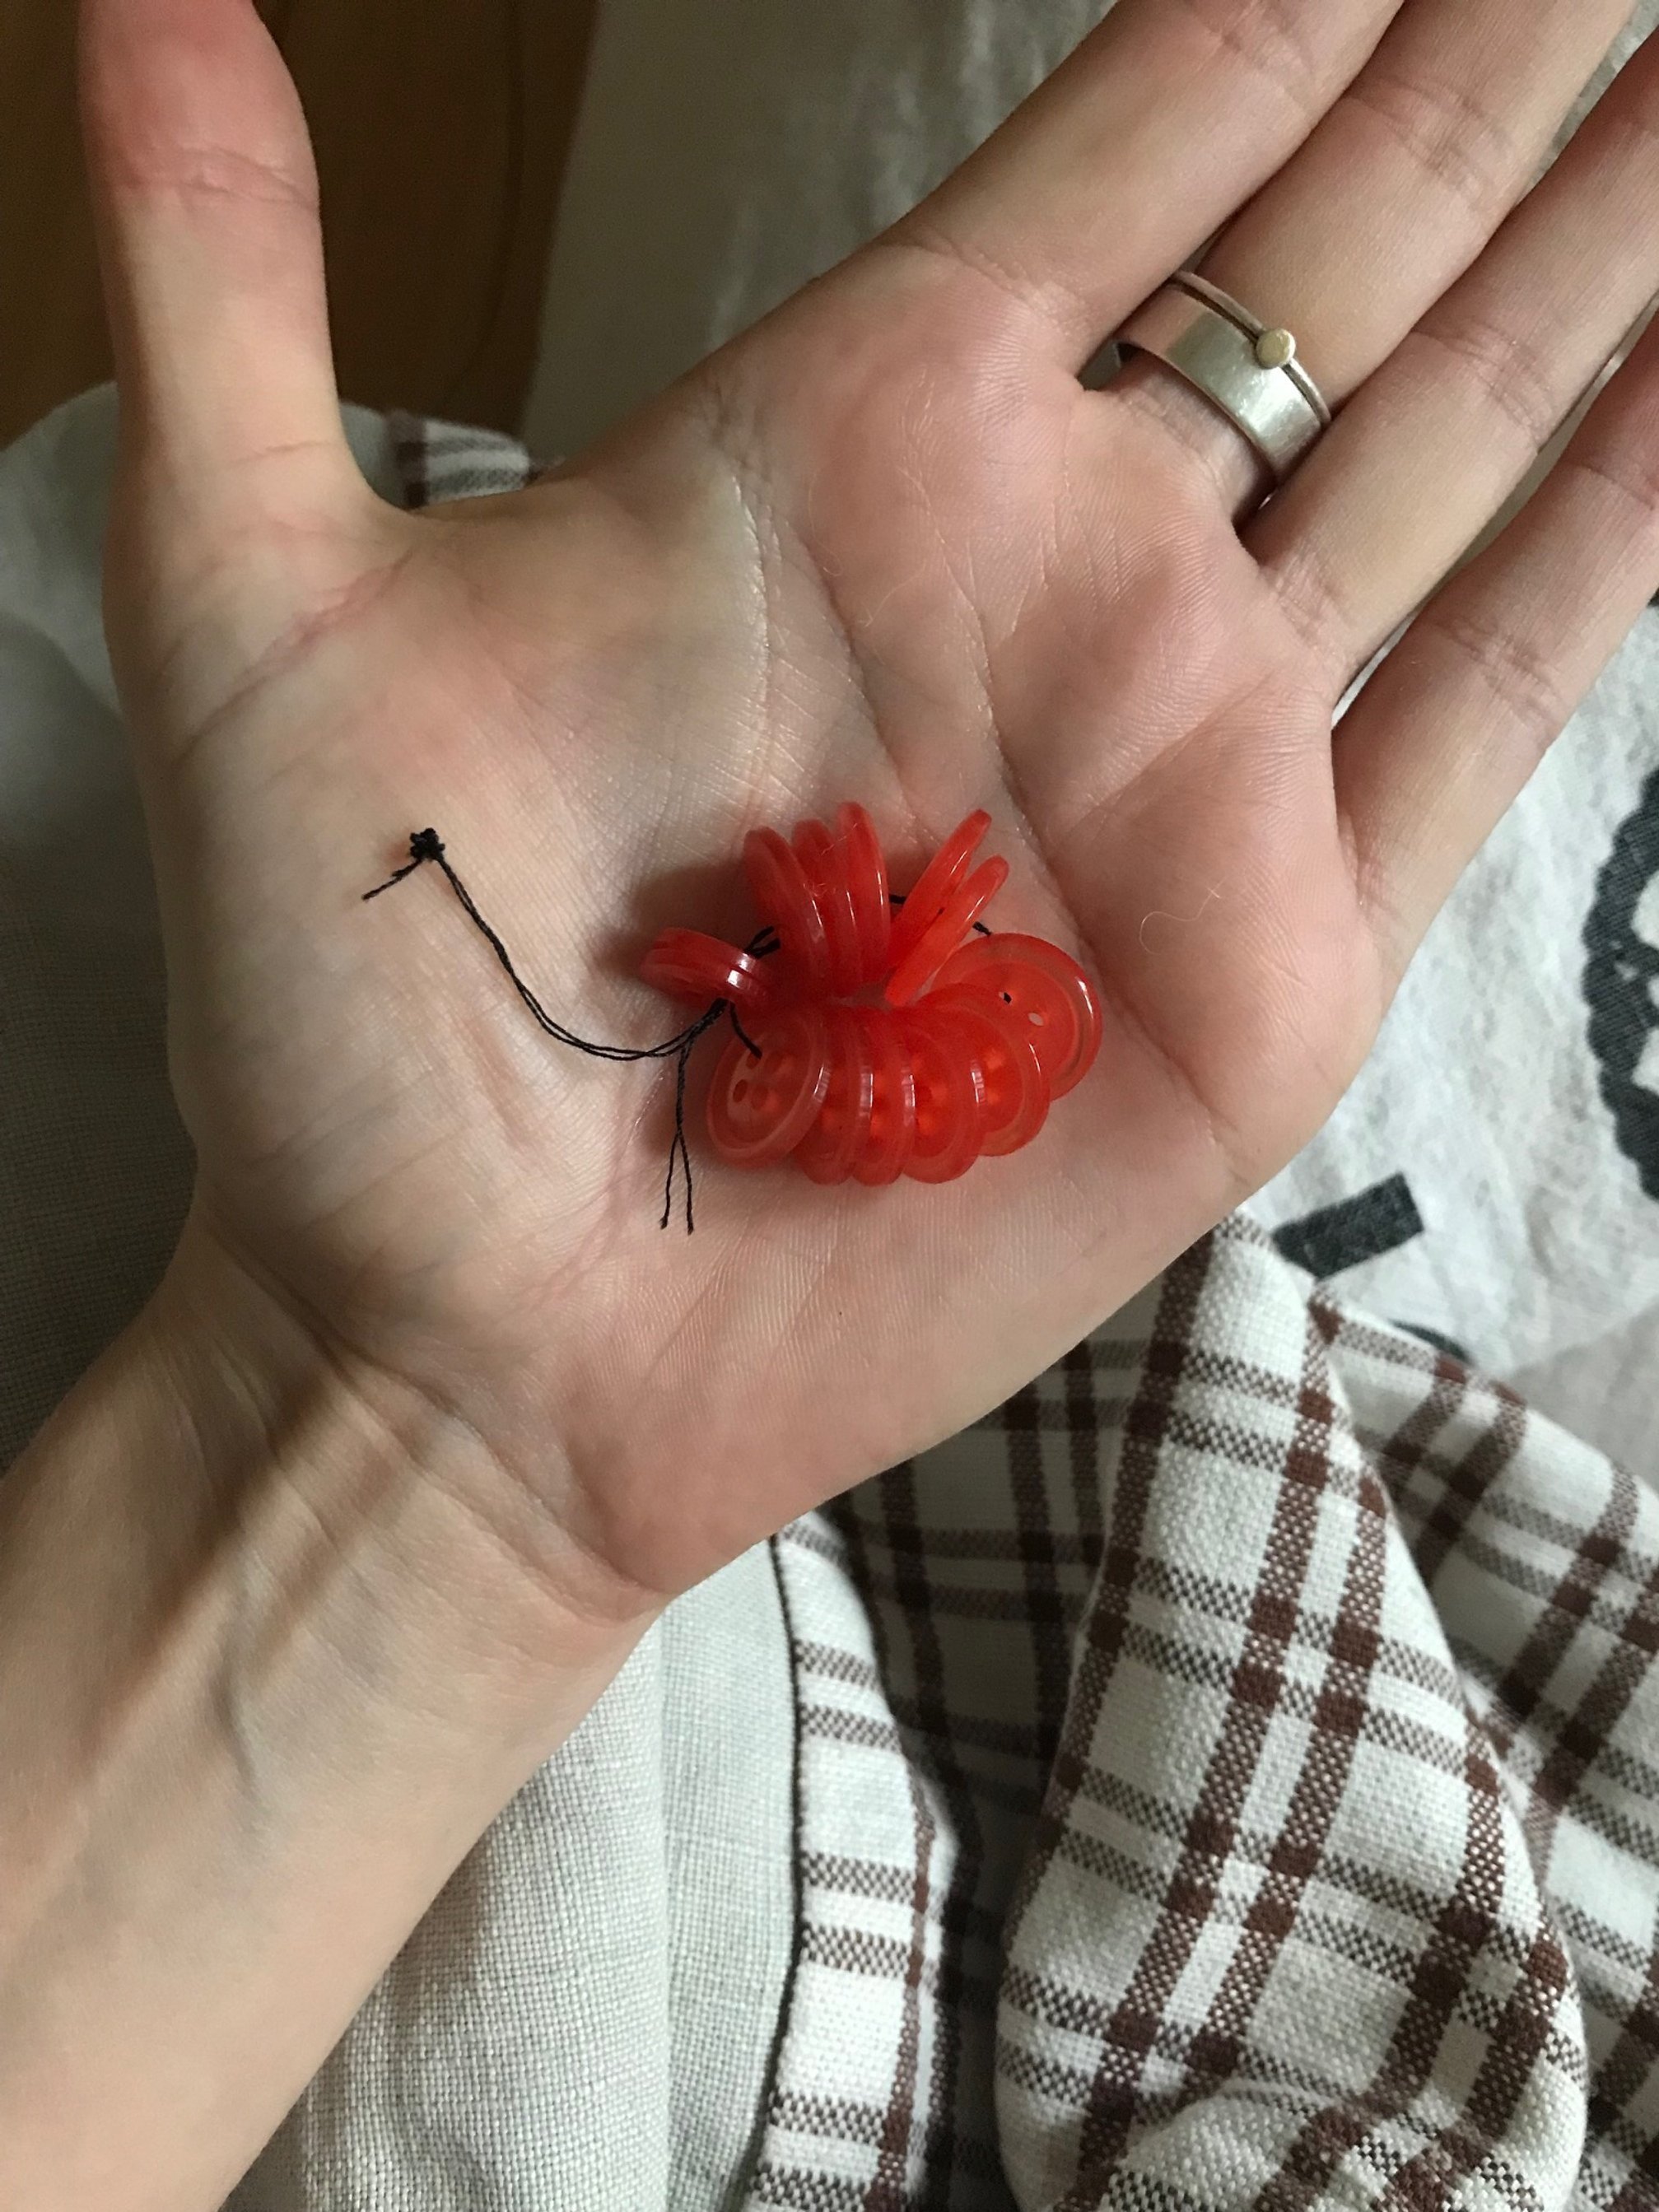
A couple days later, I happened to see an adorable little vest that my friend Meg made, that she posted in a Facebook story that I ferociously screenshot (see pics below). She mentioned that she had pulled the mismatched buttons from her grandmother’s stash, which reminded me to check my own grandmother’s sewing table for buttons. Lo and behold, these little coral-orange ones made clear they were meant to become the fasteners for this vest (also see pics below).

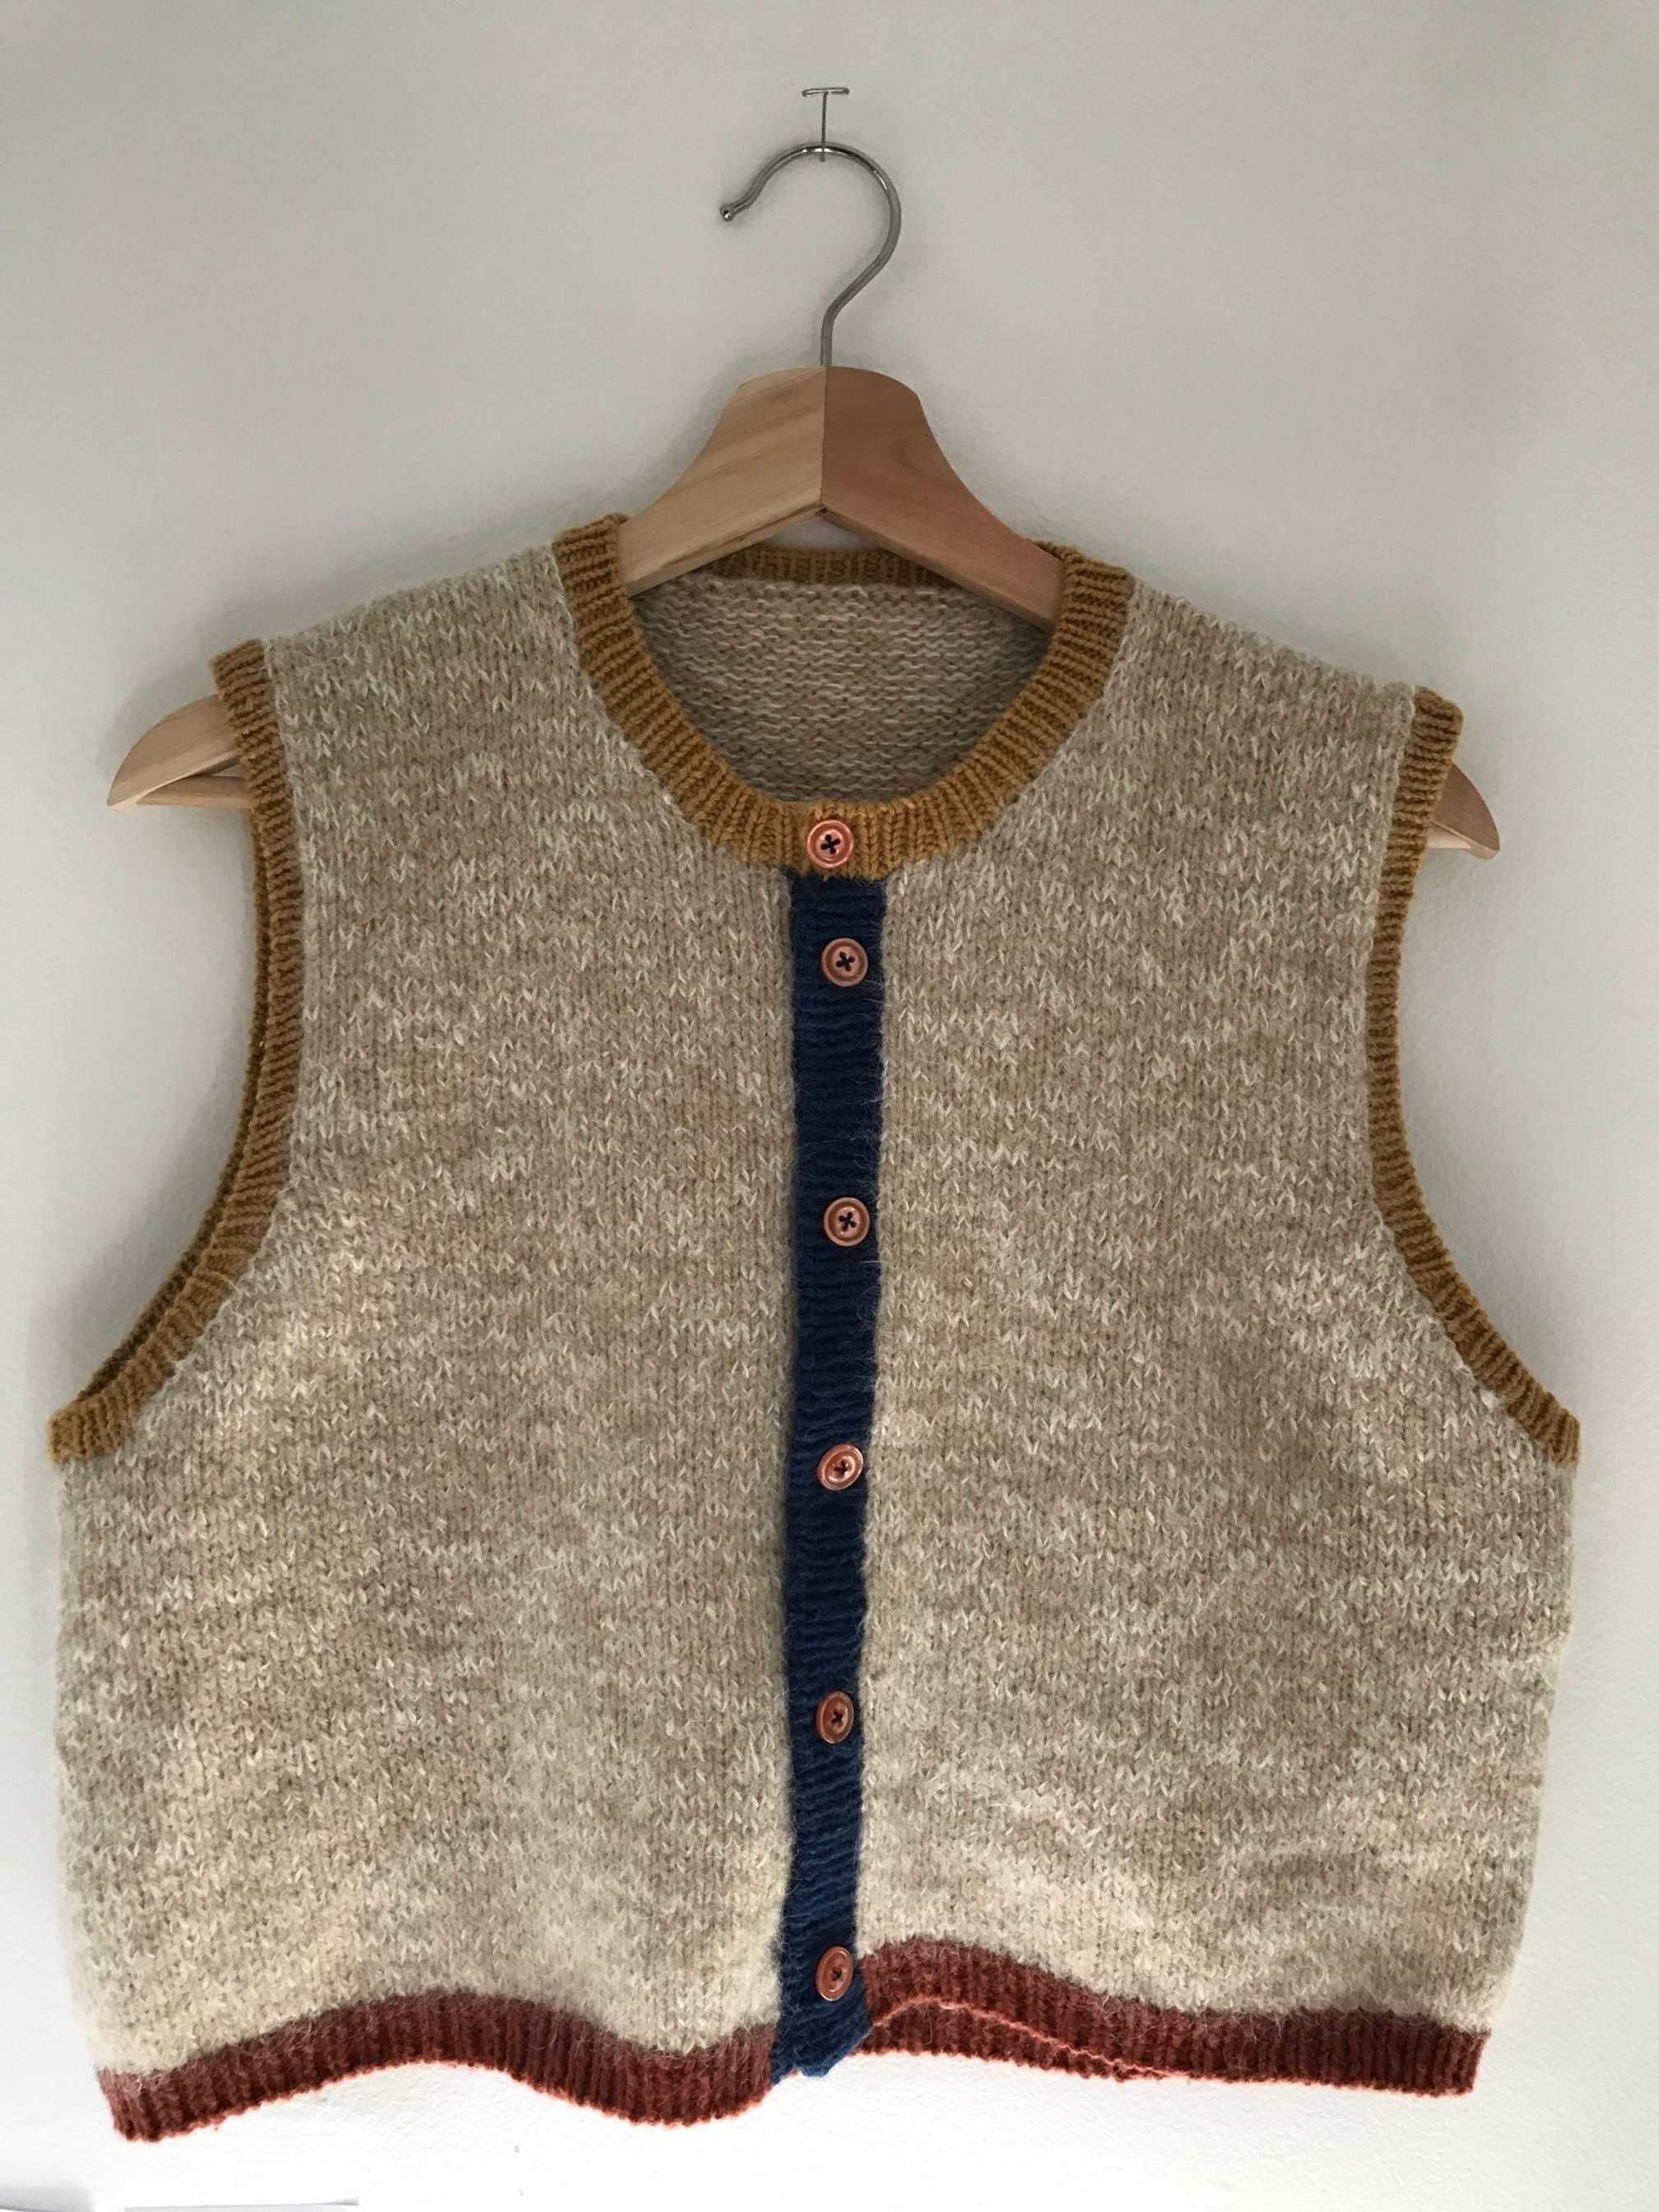
I cast on right away with Snoqualmie Valley yarn I bought in 2016 and dyed with foraged oak galls in 2019, held together with an undyed skein of alpaca/silk from Black Squirrel for softness and loft. The vest revealed itself to me as I knit it. The colors I had on hand for the contrast ribbing slowly but surely made clear they were not right - too little yarn, not the right contrast. I set aside my intention of making it from “waste” yarn, and instead I followed my instincts to Avenue Yarns one Saturday. I put together this palette which Josh rightly called “earthy primaries”. I couldn’t explain the color choices - the nearly cobalt blue, for one, being way outside my usual comfort zone. But it felt like something inside me was speaking, so I just listened. And I’m really glad I did - the colors together just feel really really right to me. They remind me of things I wore as a Kindergartner, the texture makes my chest and stomach feel held in all the right ways, and there’s something extra tender about being fastened up with buttons my grandmother touched.
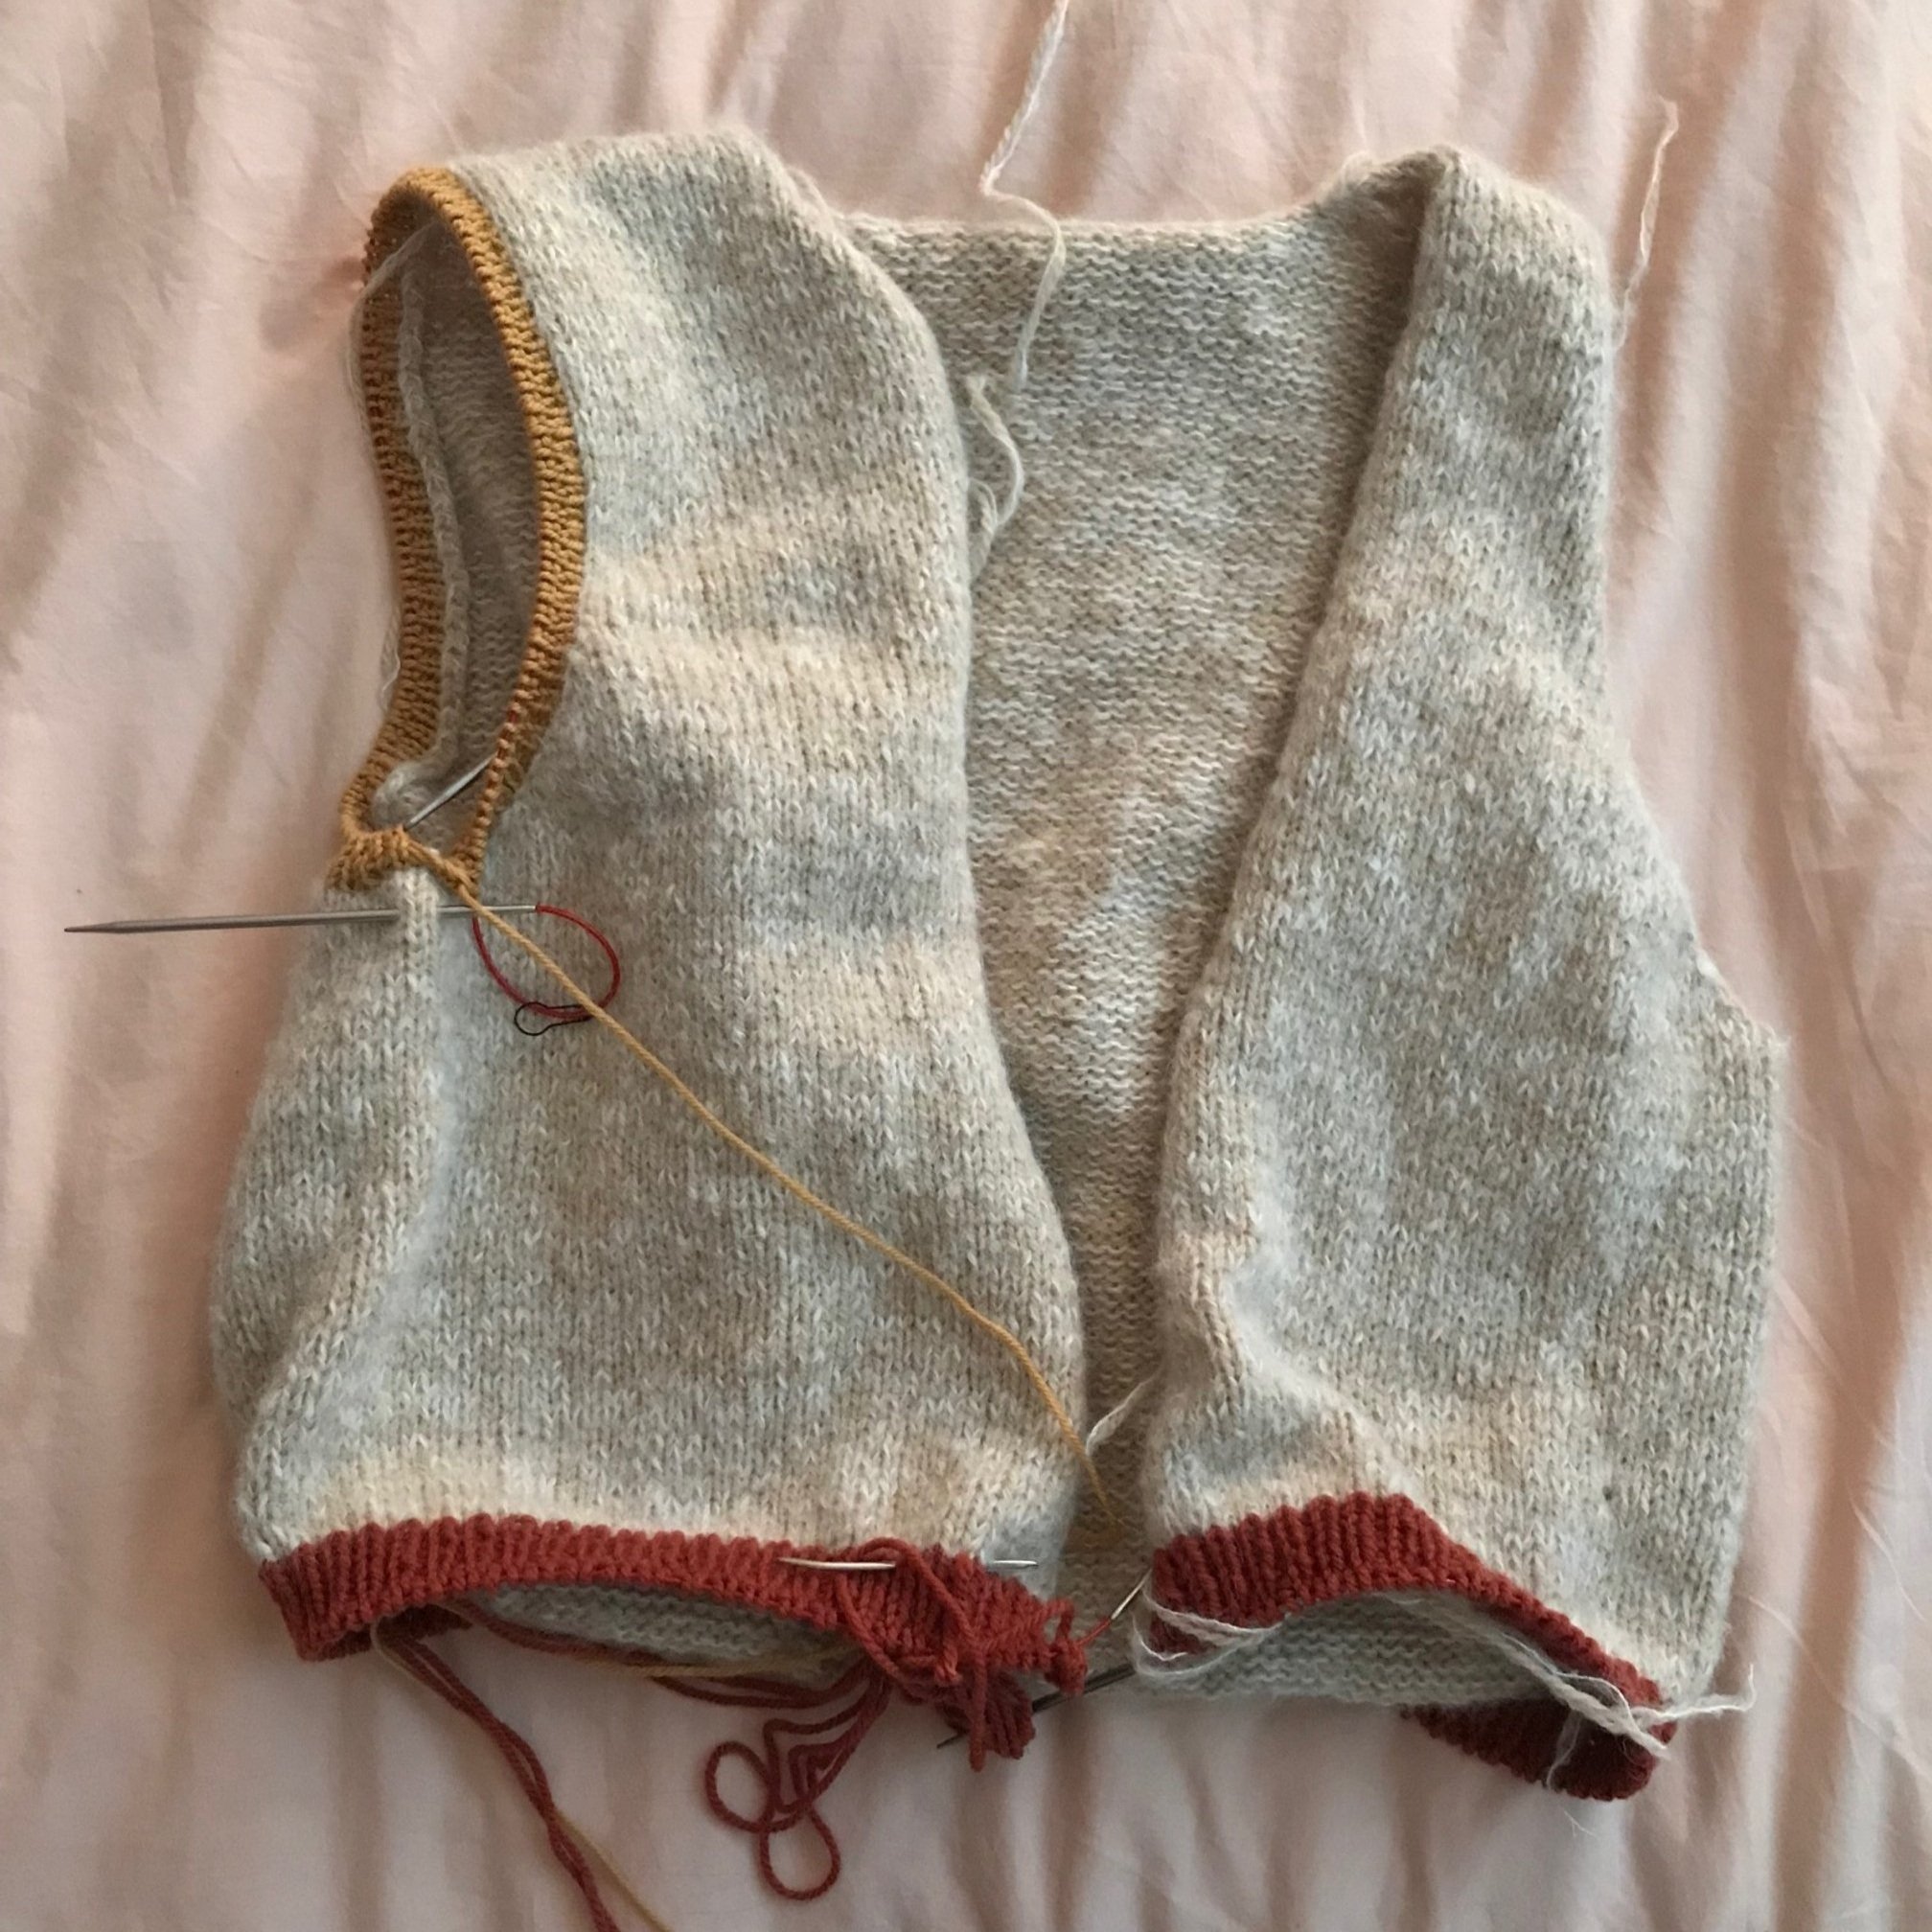
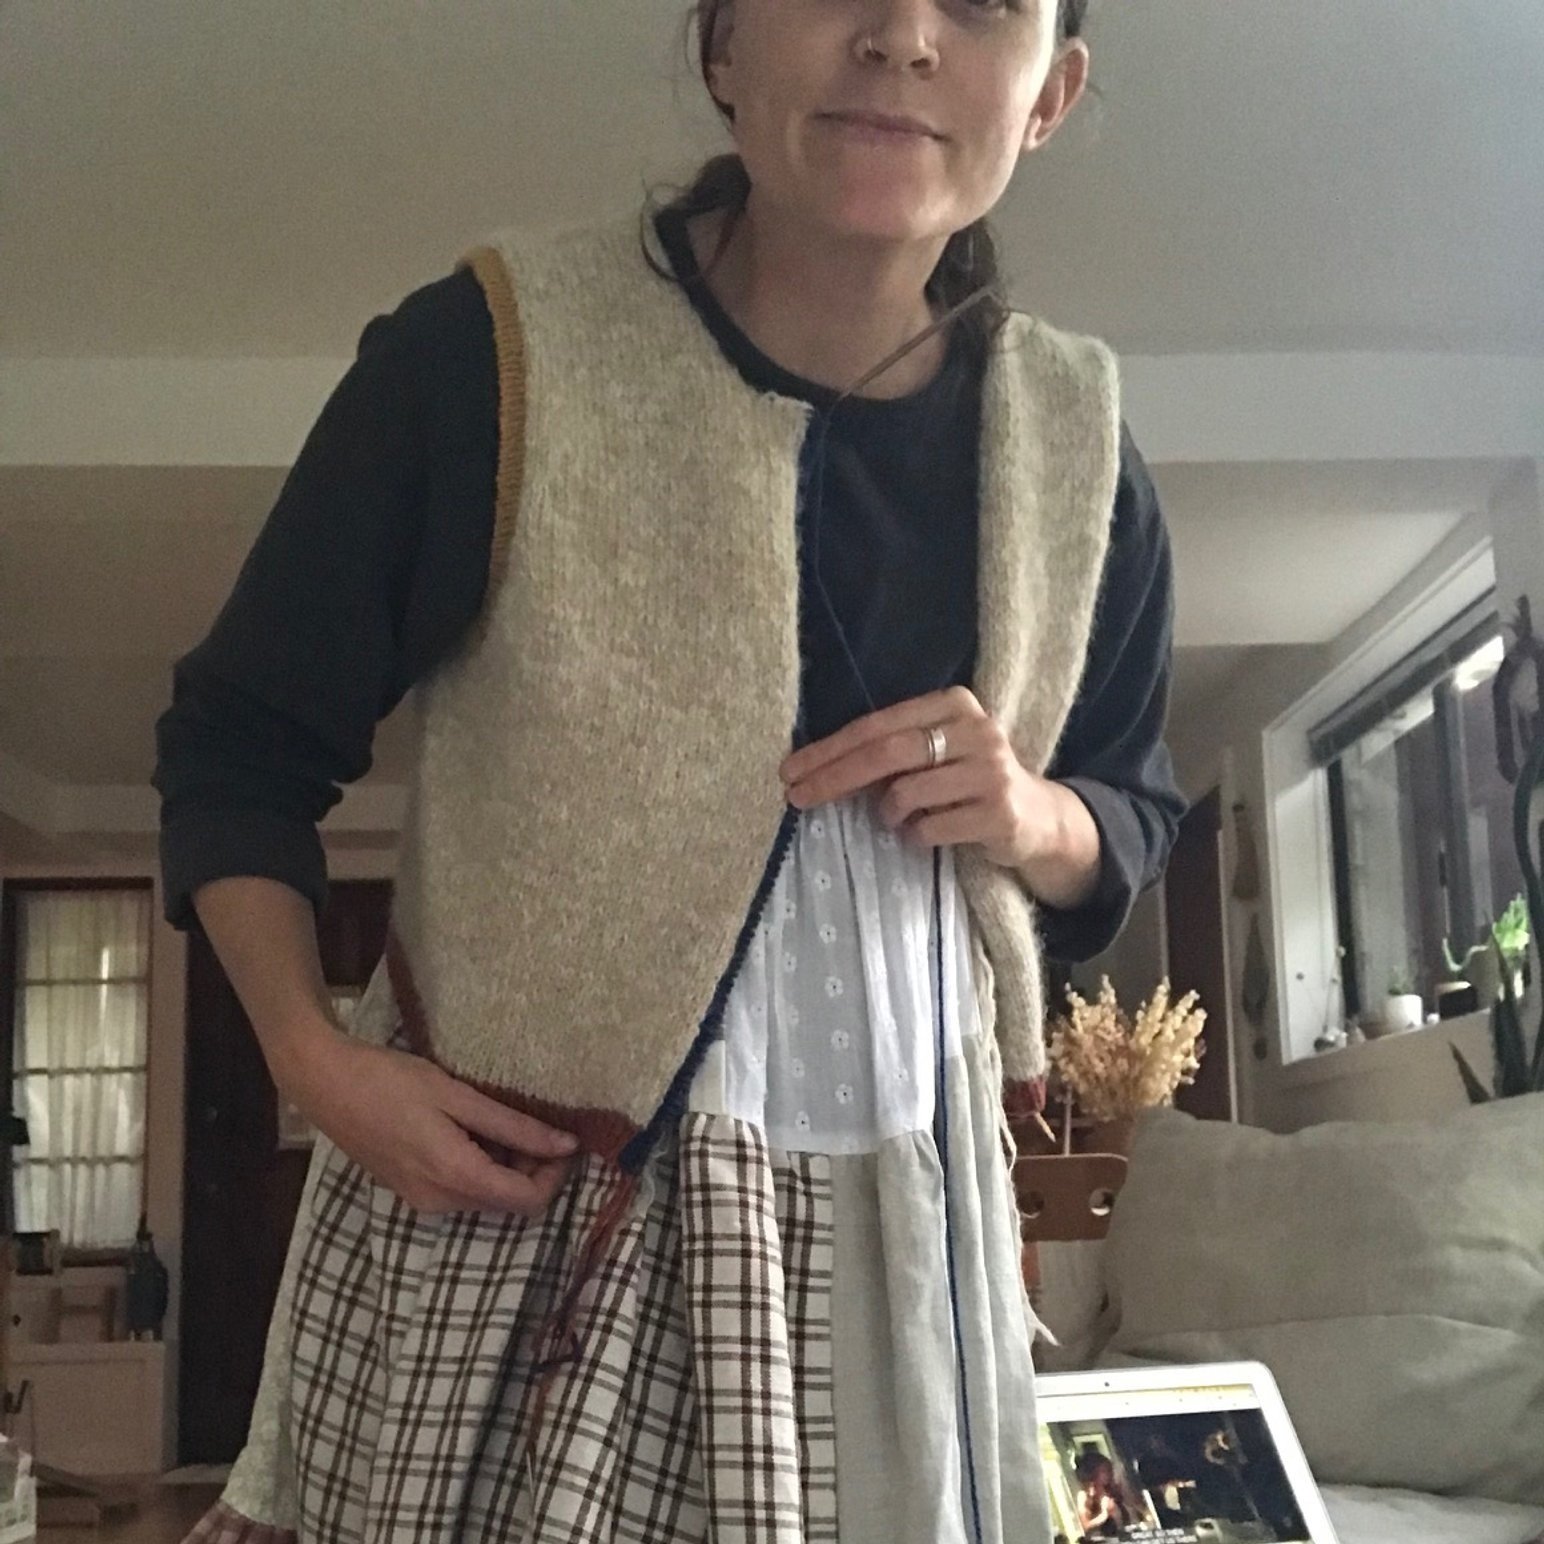
Here’s what I made:

Vest No. 4 by My Favourite Things Knitwear. No major mods, just that I didn’t pay attention to how long the pattern said to make it and instead eyeballed it off where I wanted it to hit my waist.
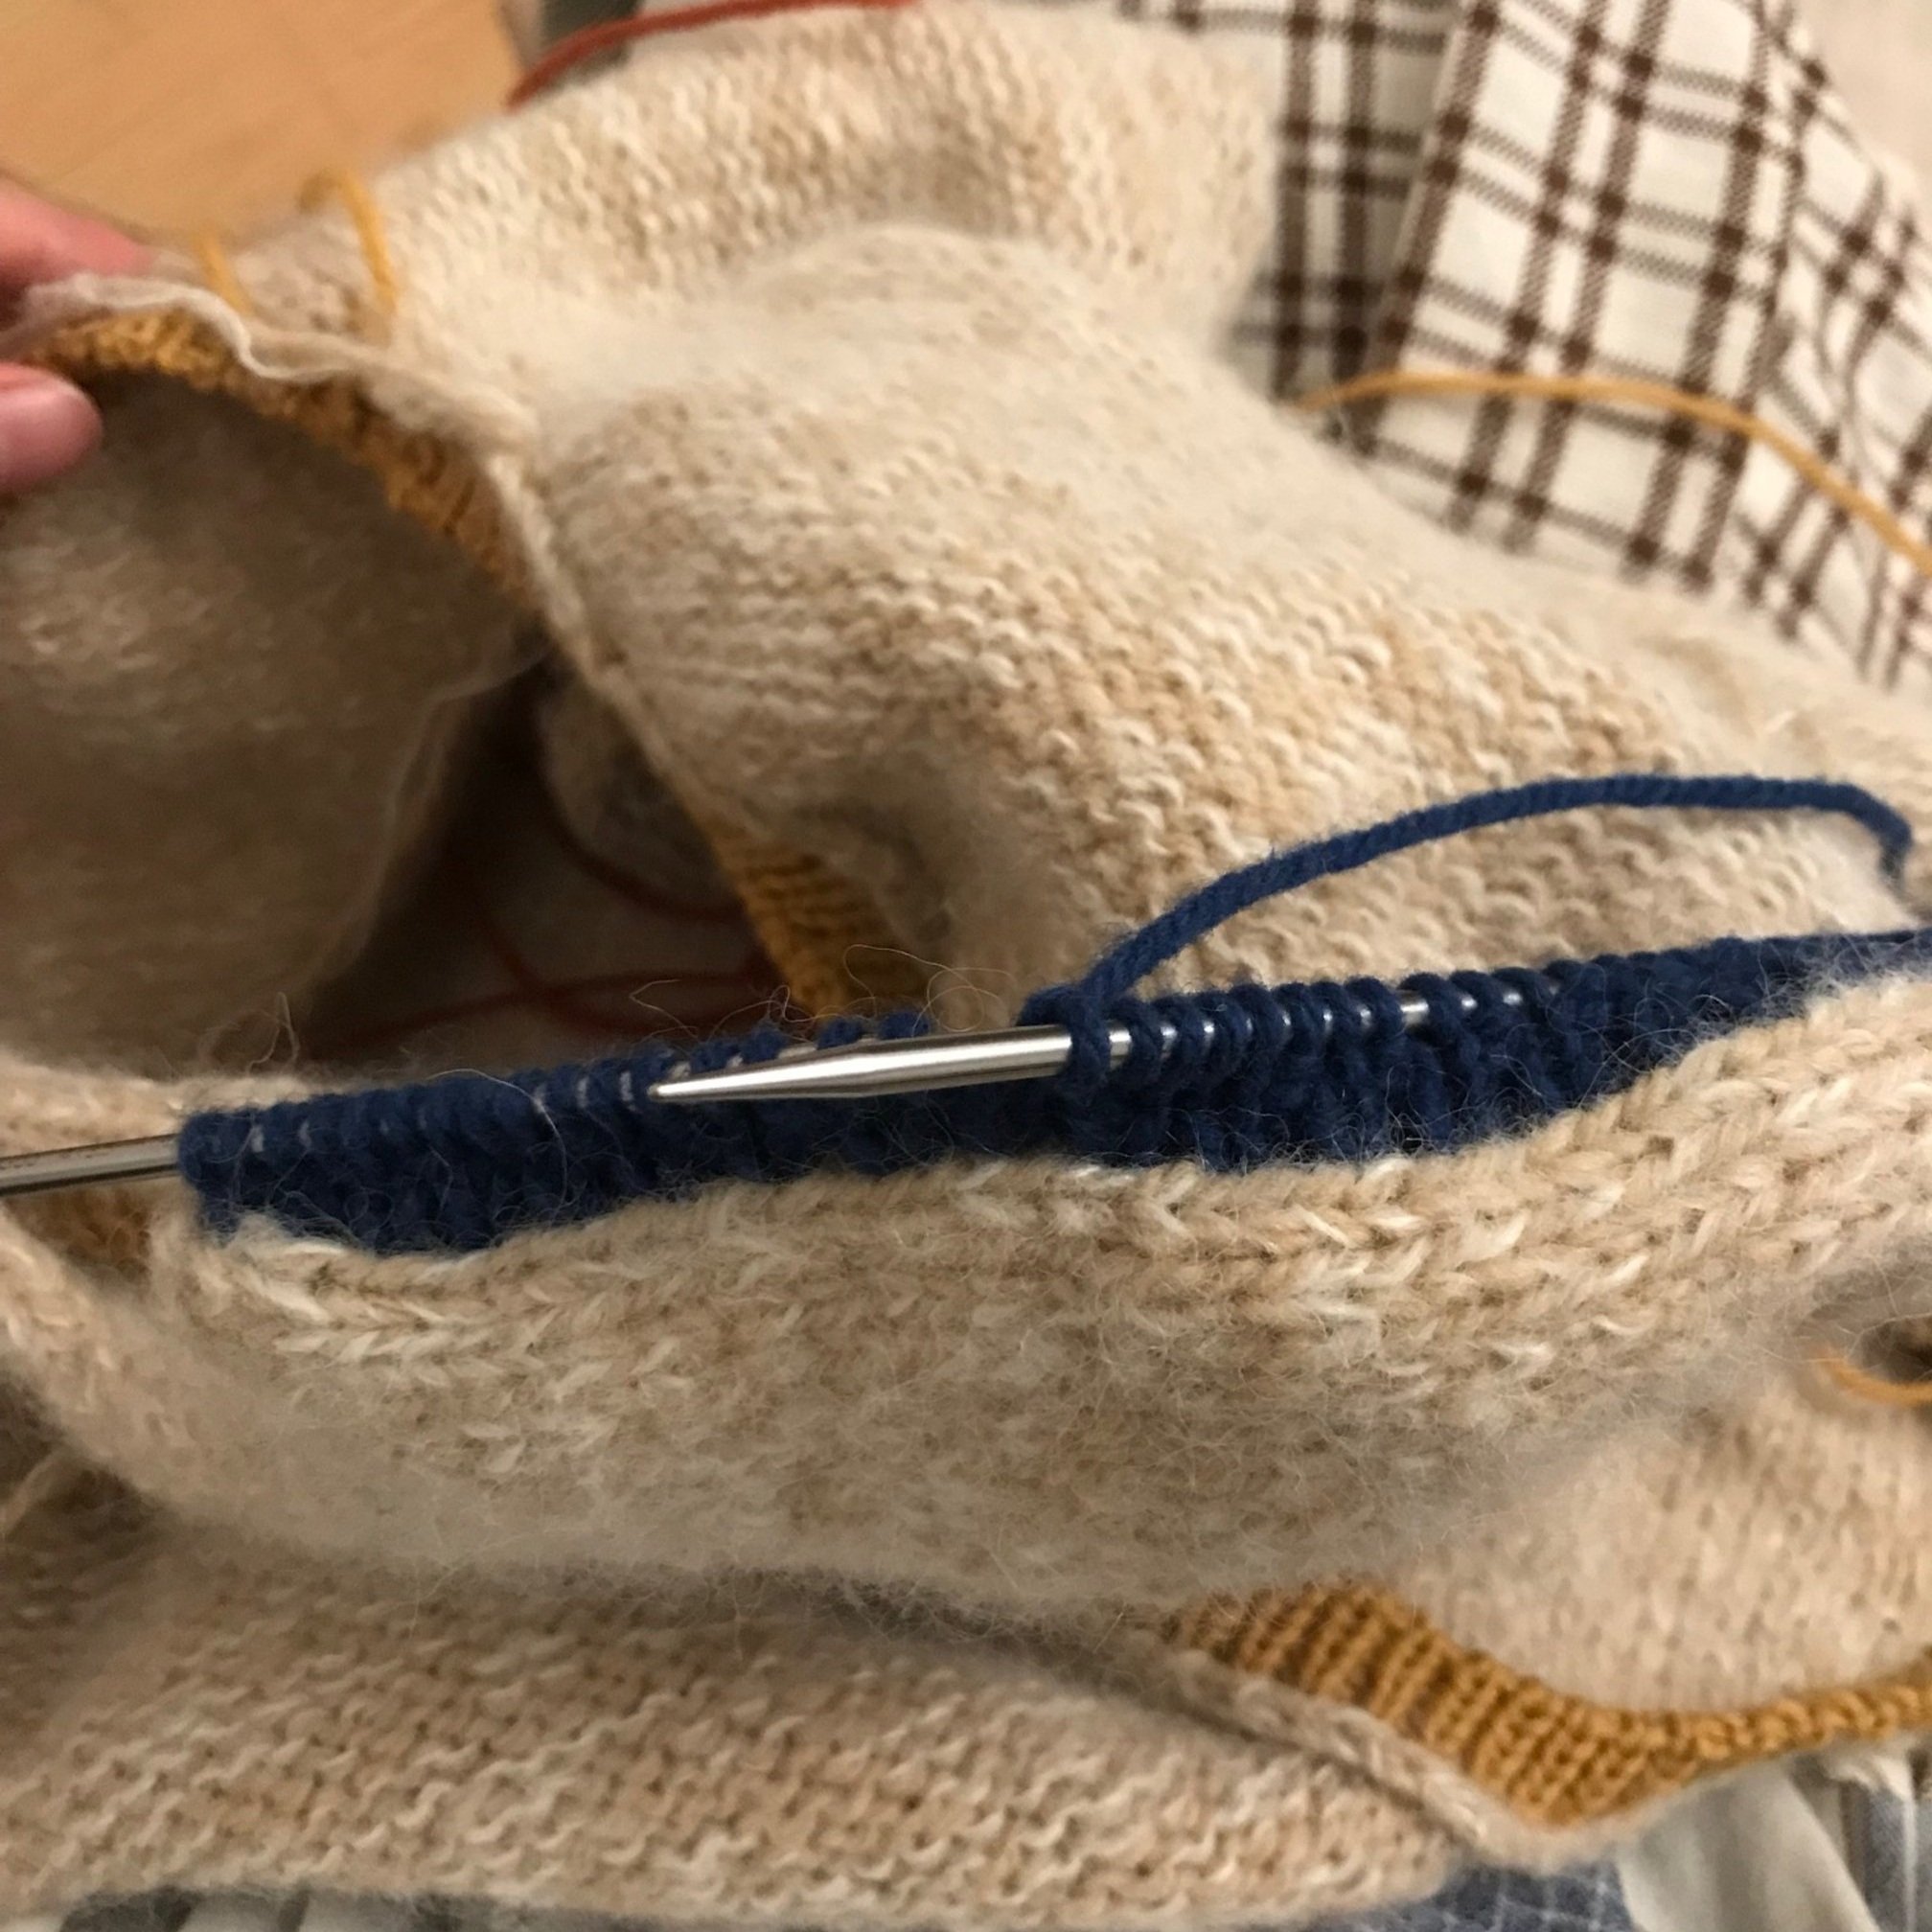
Skills practiced:

Italian Bindoff - wow, this one took me a minute, but once I got the hang of it, I found it a lot easier than the long tailed tubular bind off method I learned for the last sweater I knit

Picking up stitches around edges, new methods for knitting from the top down

Things I'm Reading!

IMG_2009.jpg

Y’all, I’m actually reading - like full, hardcover, printed & bound books. I feel like a millennial trope who just can’t with longform, but if I’m being really honest, reading books has never come easily to me. I’ve always struggled to sit still long enough to get engulfed in a book. Some of my earliest memories of reading involve assignments for class in elementary school, when we were tasked with reading for 15 minutes a night. I would sit on a chair in the living room, and my dad would put a 15min timer on the microwave, and time would just i n c h by. My eyes would dart back and forth from the microwave to whatever book I was trying to read, willing the time to move faster (ultimately leaving me confused & without any real meaning or joy gleaned from the book). 

Much of my life in reading has felt similar- though without the microwave timer - I have trouble staying focused and still long enough to make meaning out of what’s on the page. I think this, coupled with the school-learned habit of reading-as-fast-as-possible-to-just-get-it-done, has left me with a lot of complicated feelings about reading and whether I am “good” at it.

I’ve long preempted what I assume can only be derision from anyone I talk to about books by saying “oh, I’m just not a reader” or “I’m a bad reader”, but lately I’ve found my position softening. I was reading a newsletter my friend Carolyn Li-Madeo sends out periodically, and in it, she described her relationship to her reading habits of late: “maybe someday I will be a focused reader again, but for now I am enjoying wandering” and oohwee, I love the idea of just allowing yourself being a wandering reader. I suddenly felt so much more at ease the fact that Eggshell Skull by Bri Lee(gifted to me by a dear Australian friend, and former podcast guest, Lauren Hunter) took me over 3 years to finish. In a way, it felt like I needed to grow up a bit before I could really take the whole text in - like I needed a firmer base before I could fully ingest the content (it is a heavy subject matter, but Bri writes about it so so well, imho). 

I recently got really excited about books while we were in a small town in Northern California, and I decided to follow the impulse and pick up a few new-to-me books to put on my nightstand and to fill in my (very small) portion of the bookshelves I share with Josh. (I got some fiber craft books too, which look great! I’ll share about those sometime soon). 

Here’s what I’ve been reading (and nibbling on, picking up and putting down): 

Female Friends by Fay Weldon - a total curveball that just stuck out to me at a used book store. The writing is so funny, jarring, and sometimes downright cruel. It was a great one to get me “back in the saddle”, so to speak.

All We Can Save - ed. Ayana Elizabeth Johnson & Katharine K. Wilkinson - I love books that are collections of essays on an important topic. So far it’s been inspiring & informing. 

Tender At the Bone- Ruth Reichl  - I devoured this book (pun intended), Ruth Reichl is a really compelling writer. 

The Weetzie Bat books - This is YA that my dear friend Grace recommended I read and I cannot put it down. Quirky/sweet/ahead of its time. 

Emergent Strategy - adrienne marie brown - I love picking this book up when the mood strikes, I was made aware of it at an improvisational dance workshop I took over Zoom last year, and it is full of intelligent and interesting ways to show up in the world. 

Something Bright, Then Holes - Maggie Nelson. Maggie Nelson’s The Argonauts is one of my all time favorite books, so I couldn’t pass this up when I saw it at the book store.

The New Jim Crow - Michelle Alexander - This is a book I start & stop and listen to on audiobook from the library when it’s available. It’s going to take me a while to get all the way through it and digest it fully (it’s meaty and so important).

A Thousand Mornings - Mary Oliver - A sweet one to pick up when I wake up in the morning. 

Seeing this list of books before me, noticing myself softening into a habit of reading as I wind myself down for the evening, I feel hopeful. I don’t know how long this wave of reading-energy will last, but I’m here for it while it does. 


A Sweater, Unraveled (Part 2) - The Unraveling & A New Form

I’m trying out pictures of my garments that are not on my body as the model, clearly still dialing it in

I’m trying out pictures of my garments that are not on my body as the model, clearly still dialing it in

(if you missed part 1, the sweater’s unraveling, you can read it here)

I often wear this sweater that belongs (belonged? I’ve definitely stolen it at this point) to my dad - it’s big and slouchy and a little scratchy and in my mind, it’s perfect. I wanted a sweater a bit like that, and I, not being immune to trends, also feel influenced by the seemingly worldwide love of Babaa sweaters. I wanted to make a big, slightly cropped, cozy sweater with long sleeves that I could pull over my fingers (which I loved to do as a child, and which still delights me to this day) and sleeves that could be pushed way up to my elbows.

the inspiration ( from babaa.es)

the inspiration ( from babaa.es)

Vivian’s Babaa-inspired Oslo Sweater

Vivian’s Babaa-inspired Oslo Sweater

I went about my search on Ravelry (as one does), and found my friend Vivian Shao Chen’s Babaa-inspired sweater - complete with notes on how she altered the pattern to make it so (bless ravelry users who leave notes! I lack the forethought (and afterthought), typically). I had started to knit the sweater using another pattern (Biches & Buches no55), and although I was enjoying knitting that, I quickly found that I wasn’t getting the dropped shoulder I really craved for this. So I bought the Oslo Sweater pattern and got to work.

I began by unraveling the baby things I’d made, it just seemed easier than unraveling a whole ass sweater. Josh, intrigued by my process, offered to help unravel the sweater, and so we sat facing each other on the couch unraveling the sweater, listening to Chaka Khan.

I didn’t swatch - which is perhaps a mistake, or a least a faux pax, but I figured my whole-ass sweater was a good enough swatch (although now that I think about it, my tension seemingly has changed these past couple of years). But luckily for me oversized means I don’t care about exactitudes (do I ever, really?).

I cast the sweater on during our trip to the East Coast in Nov of 2020 - Josh and I drove there and back to be able to see his family & we managed to get a couple of socially-distanced friend visits in, too, to our delight. I knit it during boring Zoom meetings for work, at night while I watched various trashy shows that I won’t subject you to reading by name, and on our cozy couch while we quarantined for 2 weeks after arriving back in CA.

The sweater was all-but-done (simply lacking its tubular bind off), for about 5 months (my camera roll really keeps me honest here, looks like I finished it on Jan 8th). I took a stab at the tubular bind off, and just could not get it to work for me. Frustrated with sitting in this learning phase, I put the sweater aside. For a few months, I felt sporadic pangs of guilt for not finishing the project - embarrassment that I couldn’t seem to work up the guts to get back to trying again, and nebulous guilt - productivity, late-stage capitalism, yadda yadda - you know the feeling, I’m sure. Eventually, I came to terms with the unfinishedness of the sweater, and then completely out-of-the-blue a couple of weeks ago I picked it up and just did it. I used the exact same tutorial I had used the time prior, but somehow this time it just worked. I really took my time with it and I took breaks - that helped me keep up my learning stamina and quelled my frustration.

happily wearing my sweater out to the beach on a trip with josh (who is hidden behind me in this photo)

happily wearing my sweater out to the beach on a trip with josh (who is hidden behind me in this photo)

I surprised myself with my attention to detail and desire to really get it as perfect as I could. I even unraveled and re-knit the neck to get it to fit the way I wanted. This sweater might be the first time I’ve really felt bold enough to take a pattern and not really follow it. I used it as a guide, which is sort of how I’ve been approaching all making this year - taking cues and then just making up the rest, adjusting as I see fit. I knit the body cropped to exactly where I want it to hit my body, just at my high hip, and I knit the sleeves flat, because my past in-the-round sleeves have tended to be a bit of a mess. I ripped out the sleeve to get it right, and learned a tubular bind off to really get it right.

It took me 7 or so months, but I have a sweater that I’m so proud of, one I really feel fits the bill of what I wanted it to do (be worn over dresses & really lean into my “sweet librarian fisherperson” aesthetic, which is my chosen aesthetic for the autumn/maybe forever). When I went to press publish on these two blog posts, my blog reminded me that I’d started writing both of them on December 31st 2020, I had the sense that this sweater would feel significant in a way that was worth sharing - I didn’t know it’d take me until June of the following year to put them out into the world, but again I am reminded that everything is right on time (& really, what’s the rush?).

A Sweater, Unraveled (Part 1) - Its First Form

the giant 500g hank of yarn from the Naturally Colored Wool Growers Assoc. of Vic.

the giant 500g hank of yarn from the Naturally Colored Wool Growers Assoc. of Vic.

2016-02-25 16.13.09.jpg

I bought this yarn for $40AUD at the Bendigo Sheep and Wool Show in 2015. I spent that weekend with Nan Bray after an out-of-the-blue email I sent introducing myself to her. We talked about “the co-ops” at UC Berkeley, our shared memories of a university campus some 30 odd years apart. I learned what a “sweater quantity” of wool was, and learned that day 3 is the day you’ll find more of the neutral toned yarns at a big 3-day yarn festival. The memories I have of this weekend are so precious to me, friendships kindled, time spent alone on trains, all the silly and practical knowledge gathered about yarn.

2015-07-21 07.59.57.jpg

I bought this yarn and a few other precious skeins - a couple of hanks of Tarndie yarn (the birthplace of the sheep breed, Polworth) that became hats for friends - trades for Close Knit’s logo (thank you, edie) and trades for beeswax-treated canvas bags, a bright yellow naturally-dyed beanie I wore happily for ages & eventually passed on to a 4 year old (I have a small head). But this giant hank - I’d never seen anything like it before - came as a single 500g unit. It traveled with me from Bendigo to Sydney, to Hobart, then via the post back to California - from Oakland, to Carmel Valley, to LA and back again.

2016-01-12 11.41.56.jpg
2016-01-14 12.45.48.jpg
the yarns I bought from Bendigo, in their various forms as beanies for friends and my first knitting pattern I sold online.

the yarns I bought from Bendigo, in their various forms as beanies for friends and my first knitting pattern I sold online.

In late 2018 (early Nov, it appears, from my camera roll), I finally decided on a sweater to make it into for myself - a Vanilla Heirloom by Verena Cohrs - a simple raglan with a nice twisted rib. I downloaded the free pattern after subscribing to her newsletter, excited that my yarn and needles just so happened to achieve gauge right away.

11/14/2018

11/14/2018

11/20/2018

11/20/2018

11/24/2018

11/24/2018

The time I spent knitting that sweater was dotted with periods of intense anxiety and doubt, the bulk of the body I knit during a weekend trip with a former partner that left me feeling worn down and sad. My parents came to visit the day after to celebrate my birthday - I cried into my mother’s chest as she held me.

11/28/2018

11/28/2018

12/06/2018

12/06/2018

12/11/2018

12/11/2018

01/09/2019

01/09/2019

About a month after I finished the sweater, I went through a breakup. The sweater fit, it looked nice, even, but I found that I rarely wore it. I wonder now if I was distancing myself from this object that was so deeply intertwined with the memory of that relationship.

In 2019, I knitted the leftover parts of the yarn (somehow my “sweater quantity” produced a sweater + more! I was delighted with my purchase) into various things-I-am-making-for-no-baby-in-particular. Wool soakers for imagined cloth diapers, wooly overalls to cover wee legs. They sat in amongst the other baby clothes I am keeping safe (hoarding?). It all just sat for all of 2019 and most of 2020, lavender satchets guarding them from moths.

01-28-2019

01-28-2019

09-20-2019

09-20-2019

One of the things that got me interested in knitting was something I read in an interview Rachel Rutt did with Wool and the Gang in 2013ish - she recalled a family friend unraveling her handknit sweaters and making them anew as her children outgrew them. Something about the simplistic genius of that really struck me, and still does. Such a brilliantly thrifty, hopeful, and care-laden act. This property of wool, it’s elasticity, its resiliency is one of the things that drew me in (and still does).

I haven’t knit all that many sweaters in my life- maybe 1-2 a year for the last 5 years, a few of which I sold when I moved to California to lighten my load. I don’t need to be knitting myself very many sweaters, but it is such a joyful act of devotion and care to oneself, I just like to do it every so often. And because I am very particular and I also don’t like buying more yarn when I have good yarn in my home, I thought that unraveling it to make something new made the most sense. After all, everything else in my life changed since I started it (I fell in love, moved three times, started a different job) why not the sweater, too?

(see the unraveling, pt 2 - a new sweater here)

On Tending

Lately, I’ve been thinking a lot about tending. I was on the phone with a friend and she asked me what I’d been making, and I really had nothing to share. I’ve knit a few rows on a scarf here and there, started a baby sweater, knit the heel turn on a sock I’ve been slowly working on since November of last year. But by and large, I have just been tending to things - dusting, sweeping, tidying, arranging, running loads of laundry, doing dishes, helping to keep us fed. Tending to our home and the state I believe it likes to be in (I like to anthropomorphize our apartment, I imagine that it appreciates being scrubbed down, like a big, dirty dog might. I even once suggested we buy our house flowers for our move-in-iversary).

I have been tending to my body, because it’s been screaming at me to, through migraines and a stiffening neck - my body has made it abundantly clear that it requires some extra tending right now. I took a day off work because of a migraine, and on that day I thought a lot about the unglamorous, unphotographable (unshareable?) work of tending - the things I spend most of my “free” time doing. I spent some time that day sewing buttons onto my raincoat, willing myself to not feel guilty for “putting it off”, instead rewriting that narrative that it simply hadn’t been a priority because it doesn’t rain much in California. I took a picture of this act, and thought “this will be a nice thing to post on Patreon”, and then didn’t post it, for who knows what reason, but certainly one was that it just wasn’t picturesque, and I’ve come to associate sharing my making practice on the internet with taking a “good” photo of it. 

IMG_2221.jpg

I sewed the buttons on, took a moment to tug on them and ensure I’d done them justice. I hung my coat back up in my closet and laid back down. I closed my computer, then my eyes. I fell asleep at 2pm. I woke up and cracked open the book I’ve most often been reaching for on my nightstand, Tender at the Bone, by Ruth Reichl (fittingly). Tender, tending, to tend - these conjugations of this word feel so ripe, and yet when I google them I find unfulfilling definitions. I think about how I have overused the word ‘tender’ in my life - how the millennial American vocabulary is sopping with it (and, perhaps the word “wholesome”, too). “Oh that’s so tender”, I text a friend in response to a picture of their niece. I wonder if I have a precise meaning in mind when I use it - I use it to convey care/love/sweetness (I had to stop myself from typing “tenderness”, this is how deep in it I am), but I think there is something in particular that is special about this word and its proximity to “attending”, and how it can also mean “naturally inclined to”. There’s something just below the surface with this word, something I’m still scratching slowly away at. 

What I do know is this: much of what I want to do in life is tend to things: the material things I steward, the people around me, myself, my space. I want to attend to the present moment, to the natural world. I want to be a tender place for others to land - in my podcast, my teaching & in my life. Perhaps I am just an especially tender human.

The Dress That Took 3 Years To Make

This dress took me 3 years to make. I wasn’t working on the dress that whole time, but from the time I bought the fabric and made a plan to sew it to the time I actually sewed the last stitches, it was about a 3 year process.

64107784227__8E4DE338-B973-45A6-870D-73C0A24DEB42.jpg

Let me wind us back a bit - in 2018, I had recently repatriated to the US from Australia, and I was working a minimum wage yarn store job. Karen Templer was hosting her yearly “Summer of Basics” and while I am not really one for internet challenges (they stress me out, tbh), this time I was allured in by the prospect of trading some internet content I’d make (ie instagram posts) with the yarn store for some yarn. I thought I’d test my internet-challenge-disliking-self to see if maybe I was wrong about my dislike. You’ve probably guessed by now that I did not, in fact, surprise myself. 

I wrote about my plans for Summer of Basics here, one of which was Dress No. 2 by Sonya Philip (or sort of this dress, I took it in a fairly different direction, you may notice). My coworker helped me cut out my fabric on a big table after the store had closed one night, and we set up sewing machines at her house to start on our respective projects. Everything about the dress confused and challenged me - the slippery linen felt impossible to wrangle, and I was constantly frustrated. I got as far as sewing up the side seams, without even trying to “finish” them, and stopped. 

Nearly three years passed. I moved house 3 times, left the fabric store, got a job at a startup, visited Australia, and ended up having two other jobs. I moved in with Josh. I slowly started sewing other things, learning bits and pieces here and there, getting more comfortable with my machine. 

Recently, I decided to try to finish this dress, although I wasn’t sure I would particularly like or wear it in the end. I hacked away at it - I cut back some width from the shoulders, raised the neckline, cut the length shorter than I had originally (when I cut the pattern out, a couple of years before this, my friend helped me make a pattern block that was longer than the original pattern, to accommodate my long legs). I improvised some side seam pockets out of the excess fabric I had, and I french seamed the whole thing together. I applied bias binding to the arm and neck holes & felt pretty pleased with how they looked. I sewed it with cotton thread so that I can decide to dye it in the future (the linen is less opaque than I’d hoped, and I am not big on wearing bras). 

It’s not my dream dress. There are lessons I’ll take about fit and drape from this project, but mostly I’m just pleased with myself for having finished it. I think so often we end up with languishing projects, feeling guilty for “wasting” materials, or sad that we let our projects languish at all. But I’m coming to believe that this guilt isn’t warranted - there will be a time for us to finish our in-progress projects, even if it is literal years later. Who knows? Maybe like me, your skills will have improved, and your willingness to try will have expanded? Sometimes a dress will take 3 years to make, and sometimes what started as a dress will not end up as a dress, and I really think that’s okay. These things often have a way of working themselves out.

How I made this: (Scrap) Quilt Vest

IMG_1538.jpg
IMG_1552.JPG

What I made: A vest from scraps of “cutter quilts”. 

Why I made it: For layering over puff sleeve outfits (of course, lol), and because I’m enjoying practicing simple garment-making by tracing clothes I already own & using scraps of things. 

What I practiced: Drafting a “pattern” from clothing I own: in this case, I traced a Mallow Soft Goods tank (roughly) to inform my vest shape.

Skills I learned: 

How it came together:

First I zigzag stitched together pieces of quilt to make a piece of fabric that was roughly the size of a crop tank I already own, comparing my patchwork to the tank and adjusting as I went (a very made-up way of making fabric that is suitable for a garment). Once I had made fabric that was roughly the dimensions of my tank, I laid the tank down and cut around it- leaving a bit of room between the tank and the cutting line for seam allowance (very imprecisely). 

I sewed the front and back together at the shoulder seams and side seams, tried it on and ended up taking it in slightly under the arms (by literally just sewing a slightly diagonal seam that ran into the seam I already made - probably ill-advised, you could just seam rip it). 

I had originally zigzag stitched over my shoulder seam edges & side seam edges, but later decided to go over them with bias binding cuz it was a lot less messy.

I let the project sit for a few weeks while I mulled over whether I would make my own binding, decided that the $15 for the pre-made bias tape was worth it in this case, and waited for the binding to arrive in the mail. 

While I waited, I cut the vest open in the front (prior to this it had been a crop that was closed on both front and back, and then I eyeballed a curved edge (to avoid any mitered corners when I applied the bias binding).

The bias tape arrived and I googled “applying bias tape to edges” to see if my janky method was the easiest way - it was, in fact, not the easiest way, and this time around, I learned to open up my binding properly and to “stitch in the ditch” (see skills learned) to stitch it relatively discreetly. 

I tried it on after binding it and I was happy with the fit, but I do still want to add some kind of little closure at the top - still undecided on exactly what, though!  

And that’s it! That’s how I made a simple little vest out of quilt scraps, a sweet little layer to wear over my puffy-sleeve creations :)

How I am caring for myself right now

As I move through a period of transition in my own life (I recently started a new job!), I have been digging into my toolbox to offer my body and mind a whole lot of nourishment. These are practices I turn to often in my life, acts of “self-keeping”, a term I learned from my friends at On Being In Your Body, one I prefer to “self care”, a term that has been deeply commodified (imho).

While I may offer up a couple of specifics when it comes to brands or apps, in general, I don’t believe taking good care of yourself needs to take the form of spending money, though it sometimes affords you the care you need - and my own access to healthcare through financial means is an immense privilege I don’t take for granted. 

IMG_1573.jpg

Here is an inexhaustive list of ways I have been caring for myself of late: 

I shower regularly. I keep the lights low. Sometimes, I bring a chair inside so that I can sit (I miss baths). I like to use a few drops of essential oils on the floor - it permeates the living room, too. My favorites are lavender, tea tree, and anything Juniper Ridge makes. 

I move regularly. Some weeks it’s a daily sunset walk around the neighborhood. Some weeks it’s a combination of moves that were inspired by the Headspace App (my membership was a gift from my former employer). I use their “Movement for Beginners” course - 28 days of either walking/running (cardio), and indoor workouts (mobility, flexibility, and a bit of strength), or meditation (day off). They have a surprising number of helpful stretching and movement videos, which I’ve really enjoyed.

I meal plan and prep. Nothing fancy here. I use Workflowy to keep a list that I share with my partner so that we can both add links to recipes and make ingredient lists. We share the labor of prepping & cleaning.

I see my health practitioners, when it’s possible, from a safe distance. Both therapy and acupuncture have been made possible in my life due to employer-provided health insurance these past couple of years. My therapist and I work together by talking and by doing somatic psychotherapy - this combination has been powerful and important in my life. When I found acupuncture and the sort of body-listening my acupuncturist does, I felt like I was tapping into some of the bodily stuff that came up in therapy, and softening it further with this body-based practice. Both of these modalities can be challenging or exhausting for me, but expansive and informative, and I’m so grateful for the access I’ve had to them lately. 

I use Headspace for guided meditations to help me rest & sleep. There are mediations for everything from overwhelm to compassion, and my personal favorite thing is the “sleepcasts”, which are basically bedtime stories for grown-ups set to an ambient background landscape (eg “cat marina”, quite possibly the silliest and cutest thing I’ve ever fallen asleep listening to).

I do a load of laundry mid-week. I tidy up the whole house each evening after work. I do a couple of “weekend chores” (watering the plants, sweeping, a load of towels) on Friday early evening. These acts of tending with reliable regularity make my weekends feel a little softer & less overwhelming, and they leave room for a bit of spontaneity.

These are several of the ways I’ve been tending to myself of late - small acts done with just a little extra attention and care. I’m curious to know, reader, do any of these resonate for you? How are you tending to yourself as we glide (and stumble) toward a hopeful spring this year?

How I made this: Baby Quilt

IMG_1342.JPG

I have had this silly twin-sized ikea duvet cover since college. It has an allover vegetable print, and no doubt, it was made for a child - but 19 year old me saw it and could not resist. Sometime that same year, a stray jacket thrown onto the bed left its mark - a forgotten pen had come apart in one of the pockets and it bled through the sheet. 

I’ve held onto this sheet, determined to make it into something(s), so when I found out that a close friend of Josh’s was having a baby, I knew what to do. I pulled out a pillowcase that my friend Aaron Sanders Head dyed with indigo and I starting patchworking these former bedsheets together. 

IMG_1346.JPG

My “baby sized quilt measurement” search was inconclusive, so I went with a size that seemed semi-reasonable based on my research, 40in x 40in. I cut (ripped) pieces of the duvet and pillowcase into 11in strips, thinking I’d piece together vertical long strips first (about 4 of them), and then sew them together to form the patchwork top. I pieced together scraps of cotton batting to make enough for the quilt, a process that is really quite magical to me. Just gently press the edges of the batting together (no overlap) and zigzag stitch it down. The pieces seem to melt together and the whole process is very forgiving. I made the backing piece out of the duvet, just a simple big piece of that fabric, made my quilt sandwich, basted it together with pins, and set about handstitching horizontal lines in white sashiko thread. 

After a nice little text exchange back and forth with my pals Grace & Maya, I decided to round the corners of the quilt (and not deal with mitered corners), and bind it with a piece of precious linen I’ve been hanging onto since my employee discount days at a fancy fabric store. 

These were helpful tutorials I used for the various parts of the quilt-making: 

Quilt tutorial from Farm & Folk (specifically the ‘quilt sandwich’ part)

Making Bias Binding from All Well Workshop 

Attaching Binding to the Quilt from Heirloom Creations

I think this is the first quilt I have really properly made from start to finish - the others I’ve worked on in my life have either become garments in the end, or I had no idea what I was doing when I pieced them or tried to put them together. I finished the quilt with a little inscription - the baby’s name and birthdate, as well as my initials. We sent it off in the post today, a hopeful gesture of connection with this newborn until we can safely meet.

On Making Space for WIPs

After a while, when I look around my home and I see several unfinished projects, I start to feel guilty - like there’s something inherently wrong with starting things and not finishing them, or not finishing them for months or years. I don’t believe this is actually true. When I am thinking clearly about this, I feel confident that there is no moral valence to starting or finishing projects, but I still feel shame about it nonetheless. 

In part, I think it’s a voice in my head that tells me I’m being wasteful, or that it’s wrong to hang onto “too many” supplies. And in some senses, I think this is true - I try to use what I have, I try to be really intentional if I buy something new, but I also know there’s not a lot of use in shaming myself for my sometimes-habit of accruing many Works-in-Progress (WIPs). I know that’s not how I inspire any kind of change or confidence in myself.

I’ve been talking with some friends via text about this lately, and I feel validated that many maker friends feel it, too - both the initial shame reaction, and then the clearer thinking that comes after, the reassurance that it’s actually okay to have multiple unfinished projects at once. 

In fact, I’d venture to guess that my projects have sometimes been made better by my tendency to work on many at once. In some cases, I let an object sit half-started for months or years, and in that time, my aesthetic sense matured, or my technical ability progressed. I was able to make something much more “me” or much more useful or long-lasting as a result of my losing interest in it.

I’ve been thinking about it lately because of a sweater project I’ve been working on. One that is entirely finished except the bind off (I even have the whole story about how the sweater came to be drafted and ready to publish - except for the bind off, lol). I haven’t been able to work up the motivation (and courage, honestly!) to finish it because I am trying to learn the 1x1 tubular bind off, and while I have been reassured by more than one friend that it is “very easy!”, the instructionals I’ve read and watched so far have not felt easy to me, and I’ve struggled to get it working. So this sweater has sat, with everything but the bind off, the blocking, and some seaming, for over a month to date.

I have a Workflowy account that I use to keep track of my life - basically bulleted lists with sub-bullets that help me keep track of things like “MEAL PREP” and “CLOSE KNIT” and “MON FEB 8 - SUN FEB 14”. I list the things I need to do there and also things I’d just like to do. The bullet “sweater bind off” has been moved from week to week and project list to project list for literal weeks now, and the act of moving it from list to list finally made me pull it out today. I was standing in the living room over a plate of banana bread, fretting - Josh could tell, so he asked what I wanted to do today. I told him that I wanted to get that damn bind off done, but that I also did not want to do it at all. I felt I had to get it done because I was avoiding it out of fear.

He looked at me and said “why not add things to that list that you want to do? Like taking an aimless walk or watching a show? Your knitting won’t expire, it won’t, like, go bad”. In that moment, advice felt good to heed, so I went for an aimless walk, and let go of the idea that I had to learn that damn bind off today. 

Instead, I followed my thoughts on that meandering walk to my sewing machine, and I sat down and made a quilted potholder, which was just the creative-juice-making activity I was really craving. 

No doubt, I’ll forget this lesson again soon, and have to re-learn that it’s okay to let things rest (sometimes, it’s good!), but maybe my wonky potholder can serve as a reminder. 

How I made this: Quilted Potholder

I made a potholder recently, using Grace Rother’s quilted potholder tutorial as a guide (which you can buy for $5 from her, or get access to when you become a patron of hers!) and hot damn, it was both an extremely satisfying make and full of a-ha! moments for a novice sewist like me. 

I’ve made a quilted potholder before, but at the time I could not figure out how the heck you could make a quilt sandwich and not have to bind the edges. Grace’s tutorial cleared that right up (and a few other lingering things I hadn’t logic-ed out) for me. 

I made the patchwork portion of the quilt out of scraps of “cutter quilts” I’d bought off Etsy (don’t tell too many people about that search term, though, it can be our secret ;) ). I’ve been using these cutter quilt pieces to make tiny vests for no-baby-in-particular and more recently, for myself - I mean, how else are you supposed to layer all the puff sleeve things we all own after 2020 cottage-cored our lives?  

I took out the scraps of the quilt scraps, and since these are already quilts, I knew seaming them in the traditional way would be bulky af. I opted instead to zigzag stitch them together butt to butt - I’m sure that in time, these seams may unravel, but it’s a risk I’m willing to take. I continued in this way, zigzag stitching my pieces together until I had made a small quilt. For the batting, I cut a pocket off a dress I made from an offcut of wool blanket from the store I worked at in Tasmania in 2016-2017. I used a piece of linen - a lovely steely blue, that one Etsy seller has used to wrap up the cutter quilt pieces she sent to me, as the backing. It was a wonky, long strip, so I cut it in thirds and pieced it together to make a backing piece that was just large enough. 

I decided to quilt the layers together with little “x” stitches, using the red naturally dyed thread I bought in Guatemala in 2018 - there’s such an abundance of that stuff in the one skein I have, I sort of wonder if it’ll last my whole life :) 

I also added a loop for holding! (again, an a-ha! moment brought to you by Grace Rother). My instagram friend Hannah Taylor sent me the most beautiful parcel of scraps of her natural dye experiments, and there was just the thinnest strip of charmeuse silk (agh!), which I sewed into a tube and used a chopstick to force it to turn inside out (it’s the smallest tube I’ve ever successfully turned inside out, so I’m particularly pleased).


On Loving The Clothes You Own - Small Alterations & Fresh Eyes

I don’t know about you, but I often feel guilty about clothing that hangs in the back of my closet (or better yet, in a “to mend, gift, sell, etc” pile) unworn - especially when that clothing was a gift or was expensive.

I’ve been trying to let go of that guilt - I sometimes feel like I know too much about the garment industry and the waste it produces, or at least, I know enough to feel guilt when I think about donating clothing.

So my unworn clothing sits. Sometimes for years. And as I gather sewing skills, I am becoming more confident in my ability to upcycle as opposed to downcycle (or just make it even less wearable for me than I already find it).

I went to the back of my closet last night and found my bag of “things I would feel bad about donating, but I’m not really wearing, either” and pulled out a few things, emboldened by the success of my latest puff sleeve top alteration project.

I pulled out these 3 dresses to start with:

IMG_1087.jpg
IMG_1086.jpg

From left to right

A dress I thrifted in Silver Lake at a farmers’ market back in 2019. It’s a lovely, weighty cotton, made in California. The color is so stunning and I love the unique collar.

My intended alteration(s): seam-ripping the sides up to approximately my waist & adding in-seam pockets in a light, scrap fabric, and taking up the hem (which is poorly finished with a serger right now) 1-2 inches to bring the dress length to above the knee on me.

A cotton-linen blend dress my friend Lauren made for me, for my birthday, in 2017. It’s such a beautiful, bias cut garment, but I so rarely wear anything that hugs my body, I find myself not reaching for it.

My intended alterations: I’d like to use the bottom of the dress to cut a little toddler dress, and since the dress is bias cut, I can easily cut bias tape out of it to finishes the arm holes. I’d like to see if I have enough left over to make the top of the dress into a tank top. If not, I think it’d look lovely as a little bear (I recently bought a zine on stuffed toy making from The Far Woods).

A cotton dress made in India, given as a gift by a small company that no longer exists. I have already tried altering this dress twice, and it just didn’t make it wearable enough for me. It was a great exercise in learning french seams, though! I even french seamed the gathered waist, I’m pretty chuffed with that.

My intended alternations: turn the skirt into shorts, and see if I have enough fabric to turn the bodice into a crop top to wear with the shorts. I think I may refresh the iron dye with a bit of iron at home, but I’ll do that once I finish sewing it (I’ll use cotton thread so it takes the dye, too).

These are my plans for giving these garments some new life - here’s hoping I can execute them as I envision! And if not, at least I’m getting some solid practice under my belt.

Smock Top to Puff Sleeve - Garment Surgery

I find it very challenging to seam rip or cut into a garment that is precious to me - and this garment was no exception. My dear friend Lily, the designer behind the brand Eli & Barry, gave me this smock a few years back, and it has hung in my closet as the sweetest reminder of our connection.

IMG_1015.JPG
the “before” pic - difficult to see, but the sweat stains were definitely there

the “before” pic - difficult to see, but the sweat stains were definitely there

the after pic: exactly as I imagined it, under some overalls

the after pic: exactly as I imagined it, under some overalls

Sadly for me, I am (and have always been) a sweaty person. I also happen to be a person who wears a lot of white - so I have a lot of garments that are so thoroughly pit-stained that they are beyond-salvaging. My scrubbing stain removal method is no match for sweat stains, and my “just chuck it in the natural dye bath” makes interesting results, but they never quite cover the stains, though I tend to love the results anyway.

cutting away most of the sweat stains - magic! imagine the rest being folded in half and sewn side to side to create a ‘skirt’

cutting away most of the sweat stains - magic! imagine the rest being folded in half and sewn side to side to create a ‘skirt’

The smock was stained in a noticeable way, but I just couldn’t bring myself to really do anything about it for over a year - until I fell headfirst into the puff sleeve trend, and had many hours in the car driving back from the East Coast. It occurred to me suddenly & with clarity - I could cut out the sweat stains, indulge my trend-following desire, and I could avoid sewing a new neckline. And I could do it all with things I already owned (except thread, I got on Etsy to get some organic cotton white thread, assuming that one day I will want to dye this blouse).

Just like all of my other dress-making attempts, I pulled out my dress no2 bodice piece and used that as a tracing for the bust, then I improvised the rest using the rest of the material. The body of the smock was gathered to become the new “skirt” of the bodice. The sleeves I patchworked together out of the rest of the fabric (again, all rectangles, just gathered to build volume).

I finished my seams primarily with a zigzag stitch & I applied french seams in a couple of places. I used my vague knowledge of quilt binding to make a cuff for the gathered sleeve. I attempted a rolled hem to get the most out of the slightly too short body I’d made (still working on that one, don’t look too closely at that hem). After a few lunch breaks and some time gathering and sewing seams on the weekend, I had a big puff sleeve blouse.

IMG_1009.JPG

What I love the most about this make (besides the fact that there was no bias tape making or binding involved) is how I held onto this piece of clothing for years, felt a bit guilty that I wasn’t wearing it more often, and how, in time, the right final form for it (for me) appeared. The fabric is beautifully sculptural on its own, and I love how the puff sleeve honors that. I love, too, that I get to hold this small piece of Lily close to me, some it sewn by her, some by me. That just feels right.

Stained Glass Dress - Upon Reflection

The stained glass dress (as i decided to name it, after hanging it up on a glass door and seeing the sun stream through it), was a Target brand double bed sized cotton fitted bed sheet. 

IMG_0911.jpg
IMG_0910.jpg

I ripped it into pieces in one of the first weeks that Josh and I lived together in our new home, and started naturally dyeing it with our food scraps- thrilled that I could take up a whole burner on the stove without guilt that I’d be taking up too much space (I’d mainly lived with 3-5 other people before this move). 

2020-05-05 11.55.35.jpg
2020-05-30 14.14.29.jpg
2020-05-23 10.51.10.jpg

The dress feels like a snapshot of a moment in time that was both fraught and so joyful, May/June 2020 and Nov 2020 (I made it during election week) - the foods that nourished our bodies during a pandemic, a bedsheet that was otherwise just taking up space. An outlet for me, a gentle way to commune with creativity, but with low stakes. I simmered pots on the stove while I worked, checking on them during lunch breaks and pee breaks, hanging them to dry on our tiny, makeshift clothesline. I dyed with avocado pits I’d saved for weeks, then their skins, shifted some with baking soda, some with iron. I did not take notes, I just did it. 

2020-05-31 13.08.20.jpg

I dyed others with a big batch of yellow onion skins, and another with carrot tops (which mostly turned out putrid, so I overdyed those with iron). I exhausted baths of black tea, and used up bags of mixed onion and turmeric root. Our freezer is half full of my dyestuffs. 

After I finished dyeing them, I washed & dried them all, folded them neatly & proclaimed to the internet that your stash didn’t have to be “fancy” or “expensive” to be delightful! I felt very pleased with myself. I taped some of the pieces up on a wall one day - I knew where I was going with it, but not quite exactly how I was going with it. 

I brought the fabric pieces with me, along with my sewing machine, in our car on our cross country roadtrip to see Josh’s parents. In a little house on the coast of Maine, the pieces clicked - a dress it would become. I sewed it together with thread from my grandmother’s stash, the hems and binding made of this raspberry tone - I wonder if she bought it to match a fabric she had?

IMG_0284.jpg

This dress exemplifies many lessons for me - learning french seams, learning how to french seam and make my first in-seam pockets, needlepoint applique (to cover a stain), tracing my pattern on newspaper, and learning how to unpick a seam & add a panel when I cut the wrong size (still dialing that one in). 

IMG_0320.jpg

This dress is an object full of curiosity and making do. It doesn’t sit right on my shoulders, but I don’t mind. I’m becoming increasingly okay with letting things just be what they are. It feels full of ideas sparked in Tamar Adler’s “An Everlasting Meal”, it feels resourceful and somehow not-quite-but-just-enough and I am really, really proud of it.

How I made this: Stained Glass Dress

Alt title: Election Week Self-Soother

photo by josh kopin

photo by josh kopin

This dress just happened. It wasn’t planned in that I didn’t know what the fabric would become, I just knew I wanted to try patchworking the pieces I’d dyed earlier this year and that I thought it would be neat to turn them into something wearable(ish) - (for more on that, see here).

IMG_0904.jpg
IMG_0908.jpg

Josh and I were staying in a little house on the coast of Maine the week leading up to the presidential election. We worked our dayjobs, we spent a bit of time bundled up walking along the coast, we both worried about what was to come. I had a sudden burst of “I really need to do something with my hands right TF now” & so I followed that impulse to the Airbnb’s iron & janky ironing board, pulled out my scraps and my machine, and started pulling the pieces together during my lunchbreaks and in the hours after work finished, an act of self-soothing when my concern was through the roof.

I pulled out my 100 Acts of Sewing Dress No. 2 pattern (this is the one dress pattern I own). I figured I’d use the bust of the tracing I have. It turns out I didn’t actually pack the tracing, so I decided to trace the pattern out. I traced an XS this time, because, against my better judgment, I thought that I had a “lot of extra room in the S” (smdh)*. I looked furiously around thinking about what I could use to trace, and realized the host had left a newspaper, so newspaper tracing it was, and I taped it up to a glass door and traced it out (cue childhood memories).

Just like for the last puff sleeve dress I made, I just traced the bodice area, since I knew I would be making a gathered skirt (which, if you don’t already know, is a rectangle of whatever the fuck size you want, just scrunched at the top, which has probably been my biggest sewing revelation). I cut out the bodice piece and started patchworking my pieces together, just responding to the pairings as I went.

I thanked past Ani for ripping many of the rectangles in the same dimensions and pieced those together to become the gathered skirt. It was too short, and I noticed I had one long piece I’d sort of carelessly ripped & dyed, which made a good border piece for the skirt.

I should mention that I french seamed all (except 2) seams in this dress. I got this inclination from Elbe Textiles - who has a really great (and funny, I might add) blog post about patchwork sewing for clothing. In the past, I’ve just sewn my patchworks without finishing the seams (because I learned to patchwork in the context of quilting, for which the insides of the work don’t really matter, they’ll be sandwiched inside a whole thing). This time, I was determined to make something more wearable & hearty & because I am a slight masochist and I don’t own a serger, I decided to french seam all (but 2) of my seams. What I enjoyed about this was that I really got to practice french seams, and I feel much less afraid of them now. If you are, like me, mostly afraid of most sewing things, may I suggest that you try sewing a whole bunch of french seams on an old ripped up bedsheet so that the stakes are low?

IMG_0320.jpg

I learned how to french seam the set-in sleeve from Grainline Studio, and how to make french seamed in-seam pockets (also my first ever in-seam pockets! this feels like such a huge deal to me, I love in-seam pockets!) from In the Folds (fun fact- Em was one of the first podcast guests I ever had!). I should also mention that french seaming all of your patchwork seams also may lead to some bulk & clumsy joins (see my skirt join and some of the seams where multiple french seams came together - learning as we go here).

The dress (and this post) sat since Election Week - with all but the bias binding and a couple of stains to cover with applique finished. I hadn’t felt excited about sewing (maybe because I am still afraid of bias necklines), and I decided not to force it.

The day after New Years 2021, I finally decided to sit down at the machine and sew the binding - Josh gave me a sweet little nudge, asking “is there anything I can do to help you finish the dress?” after he noticed I was fretting about it. So I finally just did it - I sat down at the machine with yet another Grainline Studio tutorial, and I slowly made it happen.

I’m so proud of this neckline, y’all! Not because it fits - it doesn’t, like really at all (because I cut the wrong size dress for my arms/shoulders), but because this is the best-looking binding I’ve done so far - it sits flat, I didn’t catch any material and cause any puckers. I’m really quite proud of it in spite of its improper fit.

IMG_6745.JPG

I finished covering one of the larger stains using applique and a scrap from cutting the dress out. I referenced All Well Workshop’s youtube video on applique and am proud of that first attempt at applique, as well.

And so that’s what I did. I made a dress out of a target bedsheet & the fit is “off”, but I love it. I love how much I learned and how interesting it turned out.

*It turns out I did not, in fact, have “a lot of extra room” & when I attached the sleeves, the bodice rode up & did not fit. we “fixed” that by opening up the back and adding about a 4 inch panel (which truthfully did not fix it, but it did make it more wearable).

How I made this: Puff Sleeve Dress (The Second)

IMG_9366.JPG

if you’re an instagram user, I’ve saved all of my sewing adventures with a bit more detail in story highlights on my account - should that ever interest you

Along the same lines as my first bed sheet puff dress, I wanted to turn the leftover fabric from an ikea bedsheet (used primarily as a backing for the quilt I made for the quilted wiksten haori I made) into another dress I’d enjoy wearing.

This time, I wanted to learn some new skills along the way (and make a better-construced garment), so I did my first french seams, and I eased my sleeves into the sleeve holes (I think that’s the way you say it?) instead of constructing in a bit more poorly (as with the first puff sleeve dress). Which is to say that I sewed the shoulder seams and side seams of my bodice before attaching my sleeves (I did the opposite the previous time).

Instead of making a rectangle for the bodice (creating dropped sleeves), I used my Dress No 2 pattern piece as a template to trace a slightly more fitted bodice (see below - but note that I didn’t end up cutting a sleeve shape, I just cut a rectangle & gathered it) that would leave the puff starting at my shoulder as opposed to mid-bicep.

IMG_9334.jpg

The sleeve puff was limited by the amount of fabric I had - if I’d had more, I’d have made an even puffier puff. I gathered the skirt of the dress, using the original hem from the bedsheet as its hem (easy life hack), and I bound the sleeves with an invisible stitch.

It left me with some small scraps, which will likely become a miniature version of the dress, because how could I not?


How I made this: Puff Sleeve Dress

if you’re an instagram user, I’ve saved all of my sewing adventures with a bit more detail in story highlights on my account - should that ever interest you

This dress began as an attempt to use a double bed sized fitted sheet, recently returned to me by my sisters who were lovingly storing a few of my things (thanks gaiz, I love u). Lately, I’ve been falling deep into internet holes like “#thriftflip” that have led me to adorable and peppy Gen Zers who are turning landfill-bound textiles into unexpected treasures. During one such internet hole, I happened upon DIY Daisy - whose penchant for ruffles and rectangles-pieced-together garment-making process really spoke to me.

I took a look at the fitted sheet that I had and thought, “that would make a decent puff sleeve dress & I think I have the tools to make it”.

I knew how to turn a fitted sheet into flat pieces from having previously cut my parents’ raggedy old flannel sheet to braid into a rug. You cut out the elastic (and save it if you’re a lowkey hoarder like I apparently am), cut up the side seams and then you have a piece of fabric laying flat. You now have to cut off the bits that were formerly covering the depth of the mattress - so now you have 5 pieces, one big main piece and 4 smaller ones.

I very vaguely followed DIY Daisy’s schematic to eyeball how I would cut my fabric to make the dress I imagined, and when I say vaguely I really mean it because I didn’t measure.

From there, it was a series of steps that were literally “baste stitches to form gathers, sew gathered rectangle to other gathered rectangle”.

I began with the bodice - I cut a rectangle out for that, then eyeballed a neckline - I made it the same back and front (but in future I might cut the back higher to fit the neckline better). I took two very long pieces of fabric to make the sleeves - remember, you need a lot more fabric than you think, because once you gather it it will be a lot skinnier than before.

After gathering the top of the sleeve, I pinned each sleeve to the bodice with right sides together and sewed a seam (this is, I later learned, a slightly unusual way of constructing a sleeve - lol). Now I had a bodice with two sleeves not yet sewn together at their bottom seam. I gathered the bottom of the sleeve and sewed up the sleeve & the rest of the bodice.

Then, the skirt! I took another big piece of fabric (the rest of the large piece of the bedsheet) and gathered its one end, leaving the other end raw.

I followed this Wiksten infographic to stitch the bodice to the skirt & then wham bam, I made a dress.

Except that i still had to finish the neckline & bias binding intimidates me, so I let it sit for about a week while I worked up the courage.

I sewed the bias binding on & it was a pretty messy effort- but it was the first neckline I’ve ever done on my own, and I’m proud of it for that reason.

IMG_9633.jpg


How I (we) made this: quilted jacket

IMG_9274.jpg

There’s something about the term “self-taught” that never quite sat right for me. We don’t exist in a vacuum, none of us are making in isolation (or, the vast majority of us are not). I first learned about sewing by watching my mother at her inherited machine (my father’s mother’s), sewing our halloween costumes. I have a vague memory of taking my first stitches by hand on a quilt (for a distant relative’s wedding?). I’ve googled the living shit out of sewing tutorials, read countless blogs on how to sew, taken classes when I’ve been able to, done skill-trades.

IMG_9259.JPG

I didn’t teach myself. I researched, stayed interested and curious, yes - but I had and have many teachers, knowing and unknowing. I was thinking a lot about collective work & ‘success’, community support and care as I made this jacket.

IMG_9277.jpg
IMG_9276.jpg

The quilt top was a gift to me by Carolyn, she thrifted it in the Bay before heading back to NYC. The quilt top was almost entirely hand-stitched. Almost - what’s so interesting to me about this quilt top is that it had one or two very short seams that were machine stitched - it was otherwise entirely hand-pieced (a messy handpiecing - a person after my own heart, I like to think).

The backing is made of a flat sheet that belongs to Josh, he bought it from Ikea when he moved to California in 2011, drawn to the color with the hope of keeping it stain-free. The cotton batting is organic, and I bought it with my staff discount back when I worked at AVFKW.

IMG_9275.jpg

The thread is naturally dyed, I bought it in Guatemala from a collective of women weavers & dyers, Textil Flor de Pericon, on a trip with my family before we celebrated my sister’s marriage.

The binding is mostly pieced together from the scraps I made while cutting the quilt, and the spots that needed bias binding are bound with bias tape I found in my grandmother’s sewing hutch (I think they belonged to my mom, though). The places where I hand-tacked the binding down, I used thread that I believe also belonged to my grandmother.

IMG_9265.JPG

The jacket pattern is the Wiksten Haori. I cut it out back in 2018, with a lot of encouragement from my friend, Jordan. At the time, I cut fabric pieces for it, and she generously sewed it together for me - I was too afraid of my sewing machine, too worried about making some un-fixable mistake. The quilted version was inspired by all the people who’ve posted their own quilted versions, making me realize it wasn’t a fool’s errand.

This quilted coat is the result of community support & care. The materials, the skills, the inspiration - it all came from outside of me. Yes, my hands put the pieces together, but it was the result of the work of so many others. I want to acknowledge, celebrate, and give my gratitude for the work that all those who - knowing and unknowing, made this jacket come to life.

How I made this: simple(st) dress

IMG_9279.jpg

This dress was an exercise in the least fussy, least complicated clothes-making. I began with a large piece of very lightweight, woven cotton fabric (maybe about 2 yards?) that was hemmed on the short ends and selvedge on the long ends. (for more pics/process shots, see the highlight on my insta stories)

IMG_9281.jpg
IMG_9309.JPG
IMG_9280.jpg

I started by folding the fabric in half long-wise and cutting a bodice out of the edge - keeping the hem in tact to create a very simple boatneck. I used a shirt I liked the length of to approximate the length of the bodice. Then, I cut that bodice in half so that I had a front and a back (sort of identical). I sewed, right sides together, shoulder seams, leaving a big opening for my head (like I said, boatneck). I didn’t need to finish the seams because of the hem the fabric had already.

Then, I sewed up the sides of the bodice, around 7inches from the bottom, leaving a large hole for my arms. I sewed it 1 inch in so that I had plenty of fabric to hem an arm hole. If I were to do this again, I’d cut the bodice about 0.5 inches slimmer than the intended sleeve/arm hole, I think because it would have made the arm cleaner. (It was fine in this fabric- so light & drapey).

Then I hemmed the arm holes (next time I’ll check how I’m folding & pinning so that my pins end up on the right side when I go to sew).

I gathered the rest of the fabric (set your machine to its longest stitch, do not backstitch at the beginning and end, and stitch across the length of fabric you’ll gather. Repeat a second time, close to that row of stitches you made. Then pull on the threads & it’ll start to gather). Once the gathers were roughly the circumference of the bodice, i sewed them to the bottom of the bodice. (The bodice I finished with a zigzag stitch, nothing fancy here).

Then I put the dress on and it was sweet but too long. So I put it down for a few hours, watched a movie and knitted and then decided to attach a ruffle to the bottom.

I cut the bottom 15in off and then cut that in half (to make a piece of fabric long enough to gather & match the width of my skirt) then gathered and attached it.

I finished the hem with a straight stitch and left it raw.

I love the way this dress feels on my body & as I wear it around, I’m learning why we have things like necklines and bias binding. But for now, it was a very sweet and simple exercise in clothes-making - simplified.

How I made these : low-waste dresses

IMG_8927.JPG

On Saturday I spent 13 hours sewing these dresses - more or less non-stop. Now, I question my decision-making when I get so immersed in something that I forget I have a body but I digress. I made these two dresses on Saturday - I didn’t use a pattern or even really have an exact image in mind, I just started with an idea and went from there. The basic premise of this making was to cut as little as possible into the fabric I have, and to see whether I could make something wearable out of my knowledge of sewing patchworks.

I began with the Patchwork Dress (I’ll call it). This dress was born of the scraps of the Wiksten Haori jacket that my friend Jordan helped make a couple of years ago- I washed, ironed and cut the pattern out and she assembled and sewed it for me (bless her heart). 

The pattern’s called-for yardage was quite generous so I ended up with a lot of leftovers, some of it completely intact. Several months later, at the beginning of 2019, I patchworked the scraps, sewed them to the intact piece and put some batting inside, intending to make a baby quilt. Something about that never stuck, and I never ended up quilting it. So it sat for the last year and a half in a basket.

After a number of Instagram and Youtube holes, I found myself coming back to a ruched top/dress with ties - seen on Tessuti and The Essentials Club . Neither of these exactly matched what I wanted to do with this fabric, but I used their pictures and explanations (and some of the measurements, roughly) to determine how to approach making mine.

All the scrunchie sewing I’ve been doing lately prepared me for working with the elastic casing and also making the straps (made in the same way as the tube for a scrunchie is made. As I went along, the first elastic band I put in didn’t sit right, so I put in a second one and I like that more. I realized the side seam I’d sewn wanted to be not-quite the side, so I sewed the straps so that they made it so.

The patchwork dress can be worn as a skirt - I just pulled it down and used the tie straps to cinch it on my waist & I like the way that turning it into a garment seemed to bring the patchwork to life.

IMG_8894.jpg

As I worked on the Patchwork Dress, I had a bit of an a-ha for what I might next make, and so the Gathered Dress was born. My goals with this were to practice gathering, and to cut into the fabric as little as possible. I bought it when I worked at a fabric store a few years ago - the last little bit left on the roll, 1.25 yards of Japanese-made cotton.

IMG_8898.jpg

I took the piece (lengthwise) and sewed a gather, then held it up to my body and realized it wasn’t long enough with the gathering to fit around my body, so I took a dress I knew I wanted this one to be no shorted than, and cut off the bottom of the fabric length, cut that in half, and sewed it to the edge of the fabric (essentially patchworking my fabric piece to be longer for the gathering). Then I re-gathered and found the the circumference worked for my bust. I left the hem undone at this point because I used the bottom edge fabric to cut pieces for the straps and the “binding” I made for the top of the gathers. I then sewed together the two edges so that I had a tube with gathers at one end (the top).

IMG_8899.jpg

I approached covering the gathers like I was binding a quilt - I cut a 2 in strip that I attached - if I did this again, I’d made it 3 inches at least, because it didn’t quite work out as a binding, the inside edge feels likely to unravel.

I made straps by folding and ironing a strip and sewing down one end, then I hemmed the bottom edge and finished off the inside of the “binding” by hand with an overcast stitch to stop it from fraying too much. Once I had it on my body, I realized that with a bit of cinching, it would work as a skirt (seeing a theme here?) so I made a couple of weird little straps and sewed them down just beneath the top binding.

Sewing garments has long intimidated me, and it felt like a truly joyful encounter with my sewing machine to make these two dresses. It got me thinking, maybe garments are not as complicated as I thought, and maybe I just need to keep approaching it with curiosity and willingness to do it ‘wrong’.